
Networking — set up tables and meetings that matter
Set up Mastermind tables and meeting rounds, book 1:1 meetings for participants, set the rules and download the meeting history.

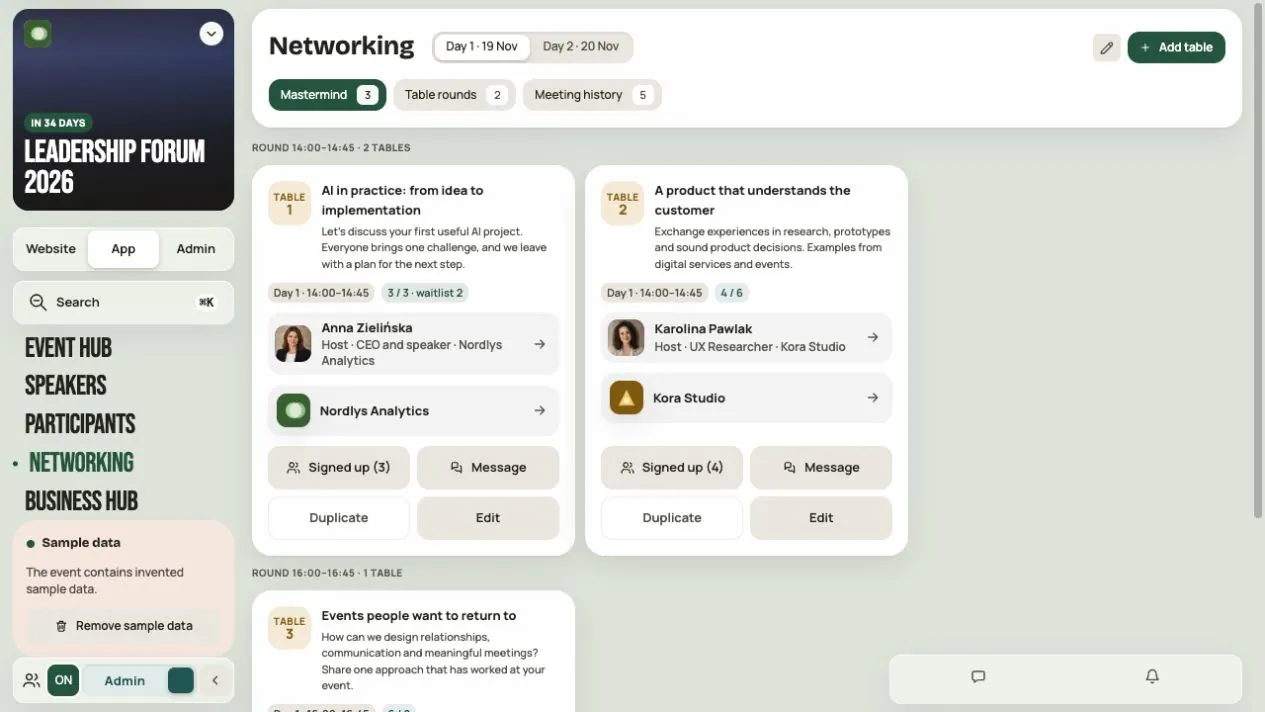
Networking helps participants meet the right people. You set up topic tables and rounds of short meetings. Sign-ups, the waitlist and times are all in one place.
Networking requires access for this event: a separate license or inclusion in the organization’s plan. Check the current price and availability in Admin → Module purchases. Being able to prepare the module in Admin mode does not yet confirm participant access.
Two formats
| Format | When it works |
|---|---|
| Mastermind | A table conversation on a specific topic, with a host and limited seats. |
| Table rounds | Short 1:1 or small-group meetings at set times. |
You can use both in one event.
Step 1. Check access
- In Admin → Modules and visibility, check that Networking is on and for which groups.
- Go to App → Networking and turn on Admin mode.
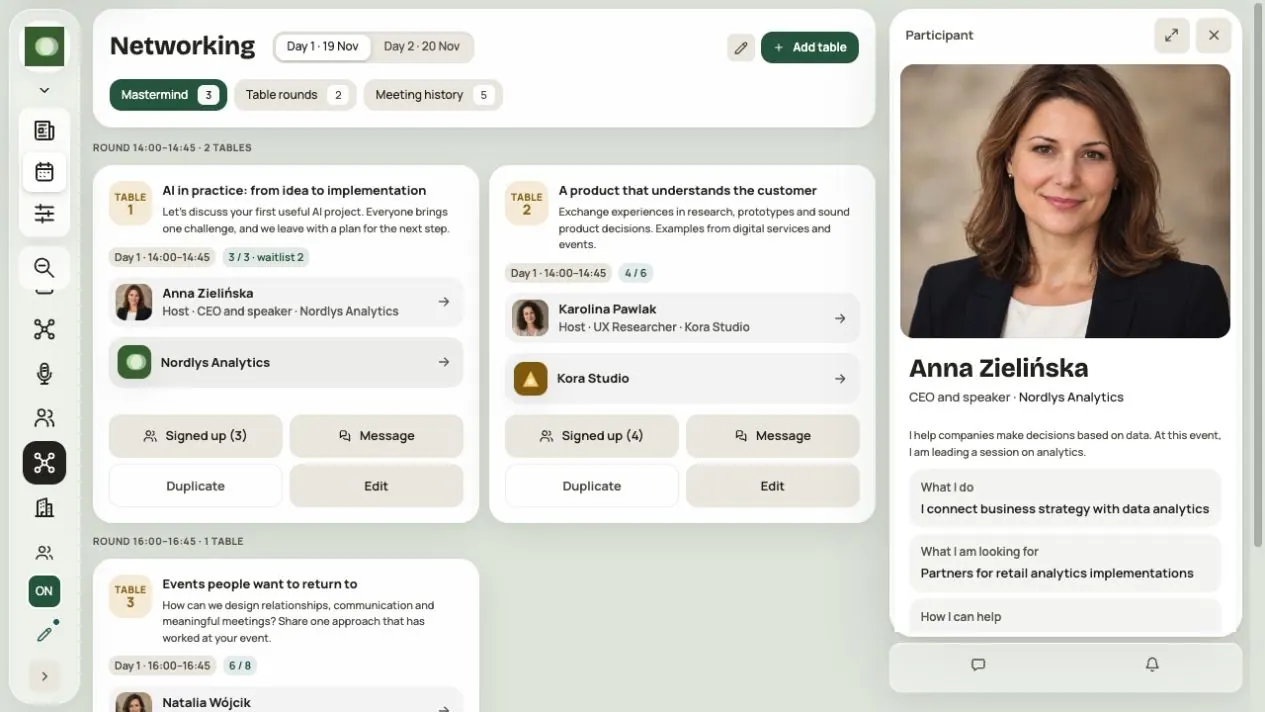
To take part in meetings, a participant must be in the event and show their profile to others. A photo, a company and the fields What I do, What I am looking for and How I can help help people choose who to talk to.
Step 2. Set the module rules
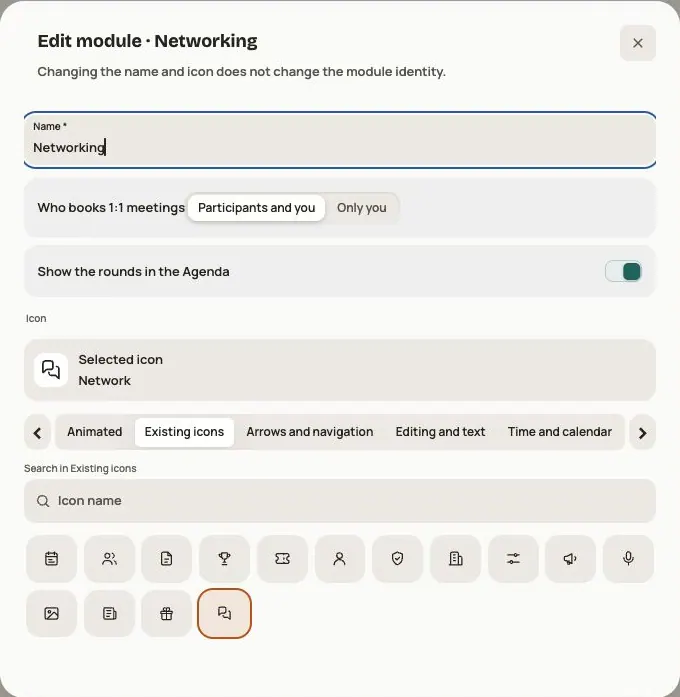
Click the Edit module pencil. In the Networking section, set:
- Who books 1:1 meetings: Participants and you or Only you. With “Only you”, participants can no longer take 1:1 times themselves. They can still reschedule or cancel a meeting you book for them. With this setting, participants do not see the Table rounds tab. Mastermind tables and their own meetings remain separate parts of the module.
- Show the rounds in the Agenda: rounds and tables appear in the program, in the Networking track.
Step 3. Add a Mastermind table
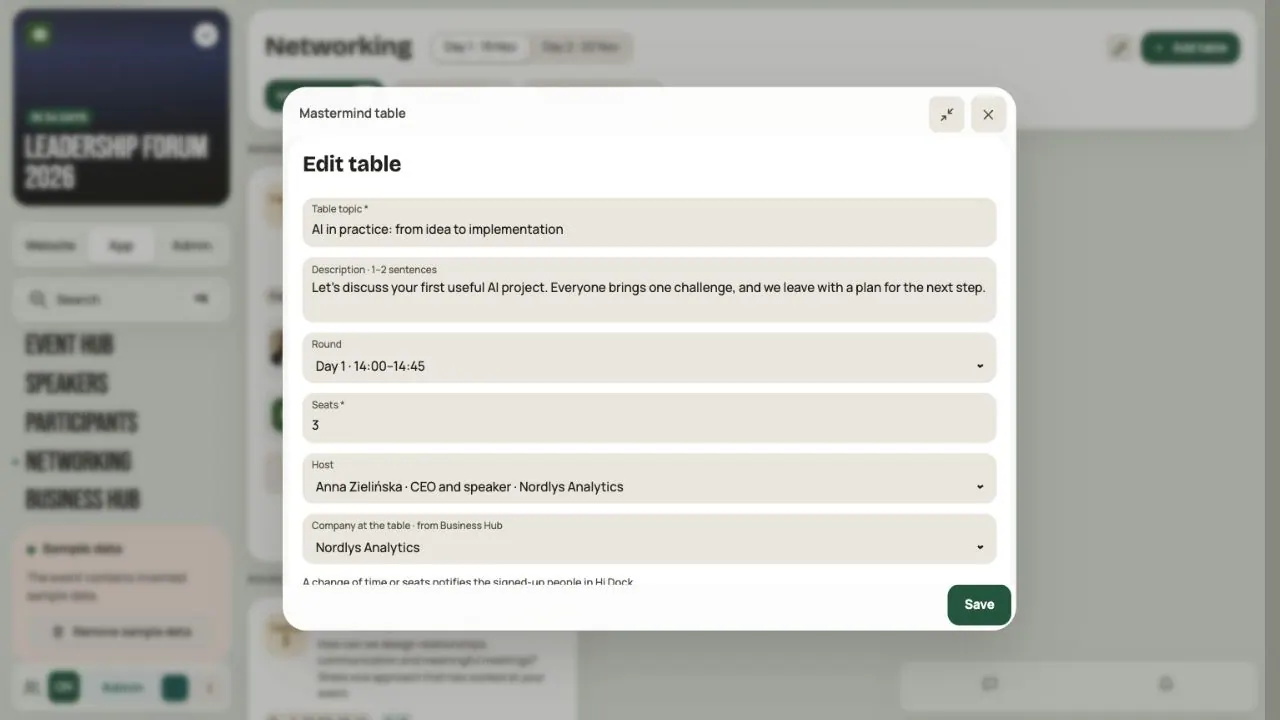
In the Mastermind tab, click Add table and fill in:
- Table topic, specific, for example “AI in practice: from idea to rollout”.
- Description · 1–2 sentences: on who it's for and what people take away.
- Round: pick existing times or add a new one (day, start, end).
- Place from the “Meeting places” pool, or New place. Name it as it's labeled in the room, for example “Table 11”. Participants see the same name.
- Seats: 2 to 200.
- Optionally, a Host and a company from Business Hub.
Click Save table.
Duplicate copies the table with the same settings but no signed-up people. After copying, change the topic, host or time.
You can move a table to another free place with Edit. The people signed up and the host get a Hi Dock notification.
If the event has two languages, prepare the table topic and description on the PL and EN tabs. Times, place, host, company and capacity are shared. Manage place names in Admin → Tags → Meeting places; in Networking you can edit the location note, including its second language.
Step 4. Manage sign-ups and the waitlist
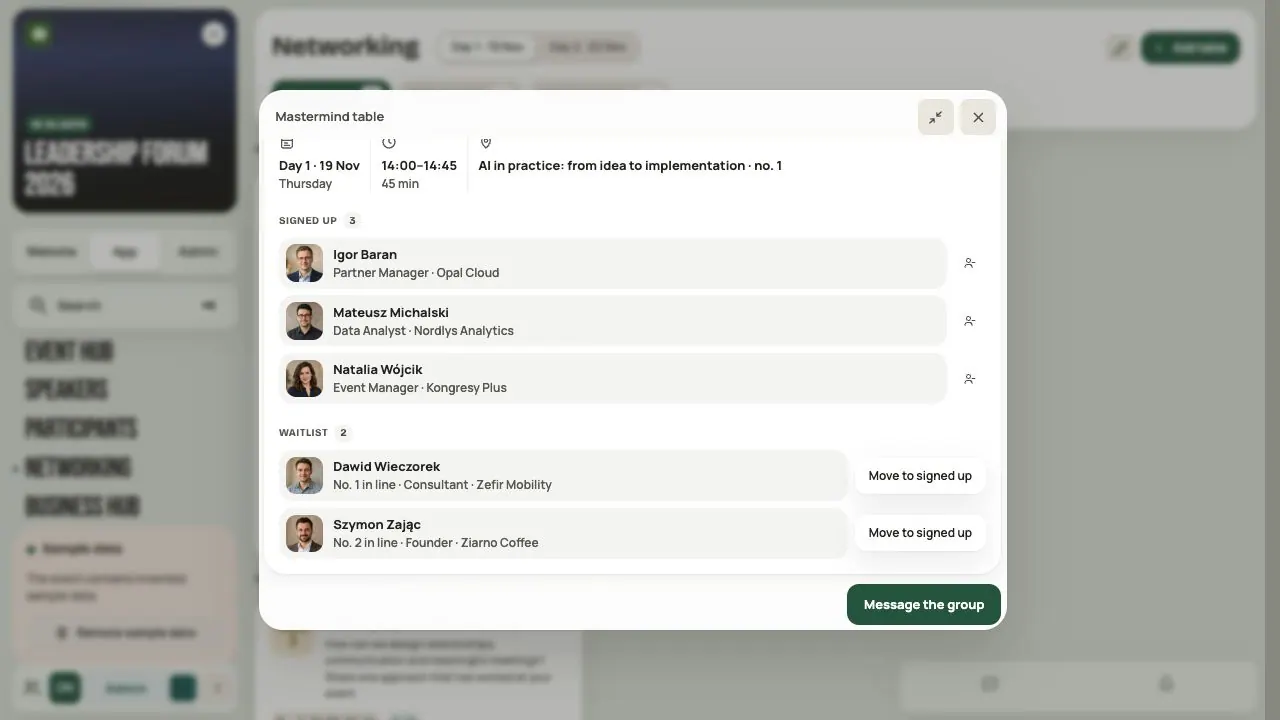
Click the sign-up counter on a table. You see the people with a seat and the Waitlist.
- When the table is full, a new person goes on the waitlist. That isn't a seat yet.
- When a seat frees up, it goes to the first person on the waitlist who is free at that time. They get a Hi Dock notification.
- Move to signed up moves a chosen person from the waitlist, if there's a free seat.
- Remove from table frees the seat. The person is notified and the seat goes to the waitlist.
You cannot lower the limit below the number of people signed up. Raising it may move available people from the waitlist into seats. A host leads the discussion and is not automatically another sign-up — check the list and seat counter.
The people signed up, the host and organizers use the Table chat. Leaving removes a participant’s chat access. People outside the table see occupancy, rather than the full list of people; the waitlist is not a confirmed seat.
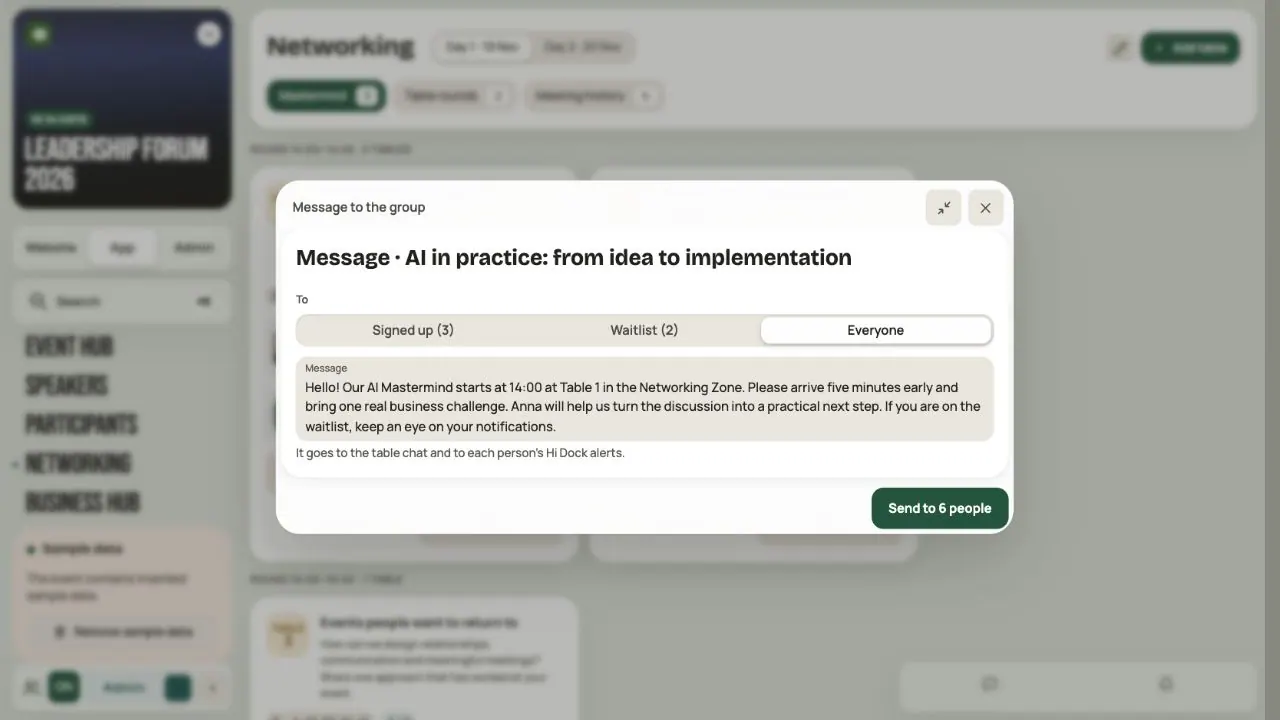
Message the group sends a message to the people signed up, the waitlist or everyone at this table. It goes to the Table chat and Hi Dock. It isn't an email.
Step 5. Set up a meeting round
In the Table rounds tab, click New round.
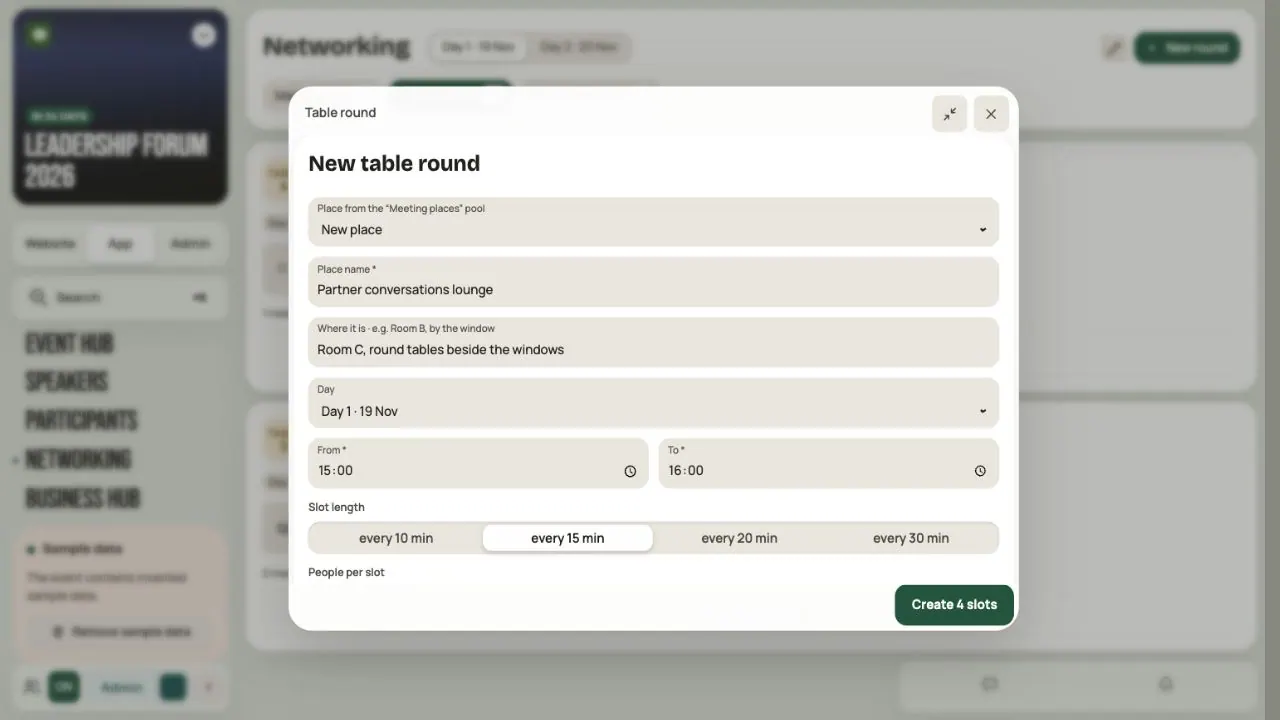
- Choose a place or add a New place, for example “Foyer — 1:1 talks”.
- Set the day and the From and To times.
- Choose the Slot length: 10, 15, 20 or 30 minutes.
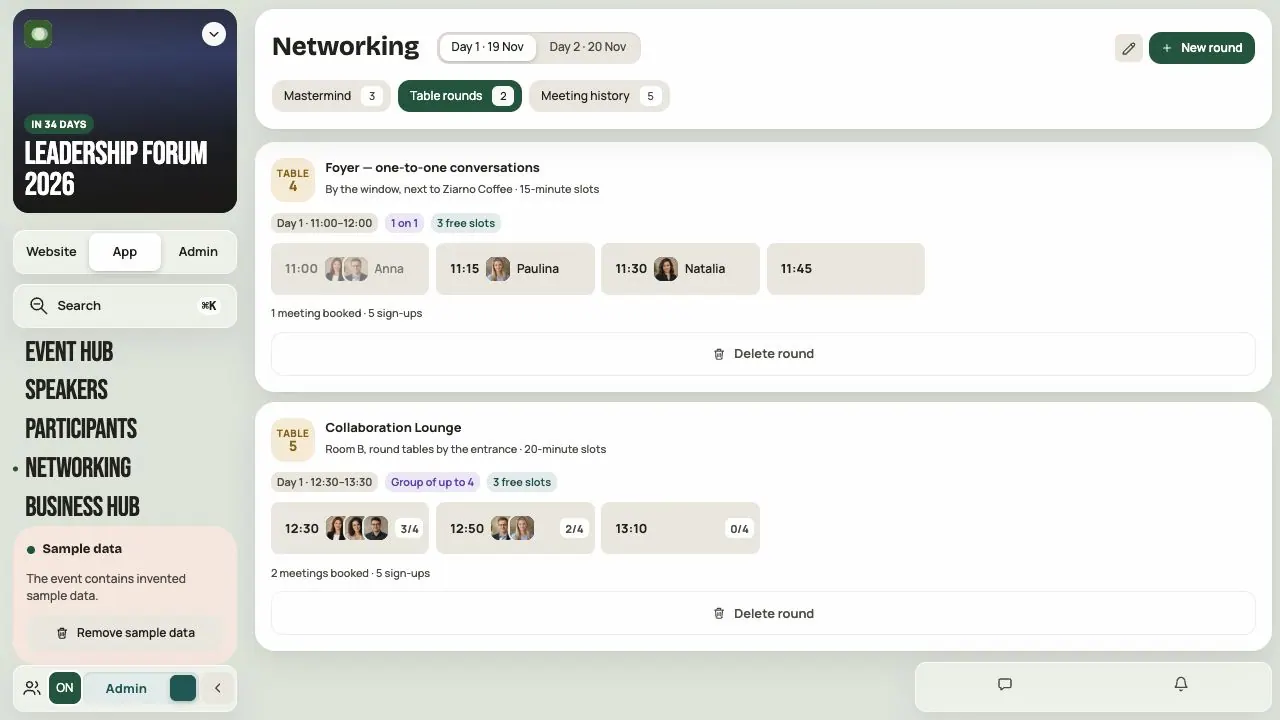
- Choose 1 on 1 or Group (2 to 20 people).
- Click Create the round.
Example: 15:00–16:00 with 15-minute slots gives four meeting start times. One place cannot hold two rounds or tables at the same time. Times use the event’s time zone.
A capacity of 2 means a 1:1 meeting. A larger capacity creates a group meeting, which people join without individual acceptance.
Step 6. Book a meeting for participants
Know two people who should meet? Book it for them:
- In Admin mode, click Book a meeting.
- Choose the first and second person.
- Hi Events shows the 1:1 times when both people and a place are free.
- Optionally add a message, for example “You're both looking for an AI rollout partner”.
- Click Book for the chosen time.
The meeting is booked at once. Both people get a Hi Dock notification and see the meeting in My plan. Either of them can reschedule or cancel it. If someone has a session in their plan at that time, you see a warning, but you can still book.
You need a 1:1 round for this. If there's no free time, add a round or choose other people.
What participants see
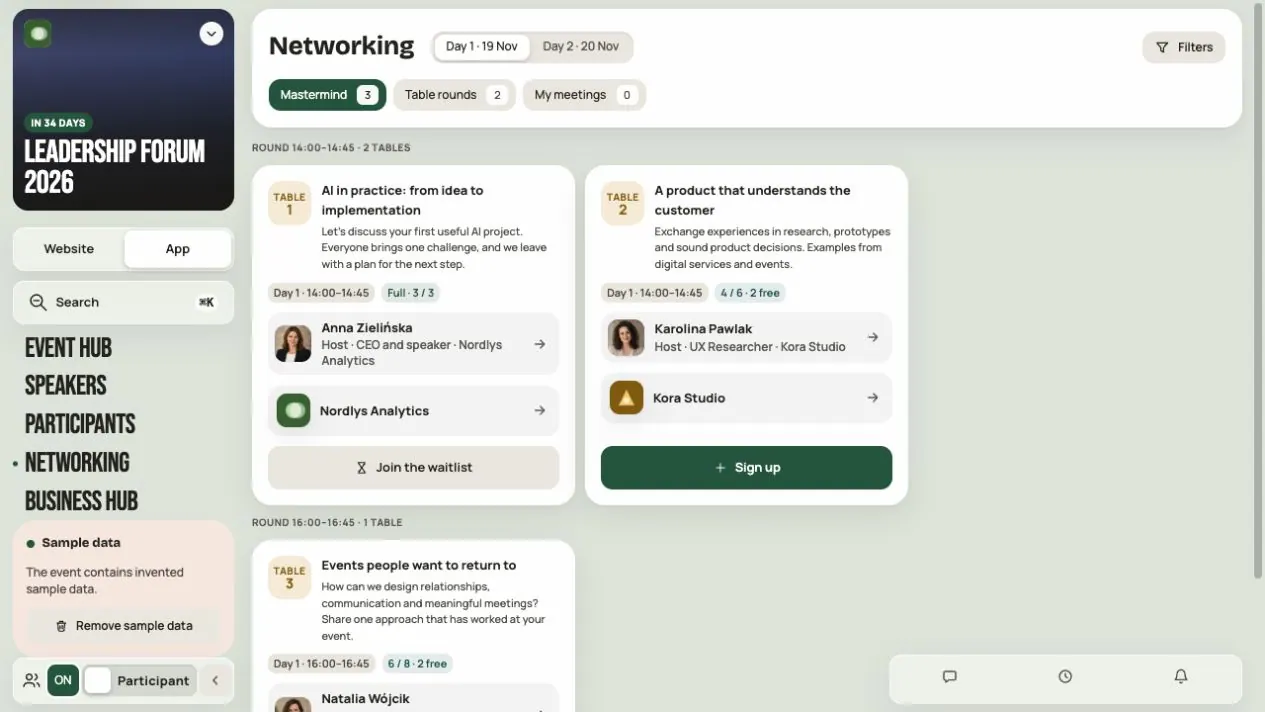
- In Mastermind, a participant picks a topic and clicks Sign up or Join the waitlist.
- In Table rounds, they pick a free time. For 1:1, they decide whether to Accept automatically. Without it, others send requests and they choose in My meetings or in Hi Dock.
- In Participants, they can click Arrange a meeting next to another person. In Business Hub, under At the stand, they can click Arrange.
- In My profile, under Networking at this event, they set I take 1:1 meetings, Accept requests automatically and When I am away (times when nobody can book a meeting with them).
One person can have one table or one meeting at a time. When switching tables within the same round, Hi Events offers Move me. A clash with a session in My plan is a separate warning; you can choose to sign up anyway.
Meetings and tables you signed up for appear in My plan. The meeting card and chat also open in Hi Dock. Check confirmation when requesting a meeting: a sent request is not a booked time yet. Accepting one 1:1 request closes the other requests for that time.
After changing settings in My profile, click Save changes. You can add up to 20 away periods.
Step 7. Check the meeting history
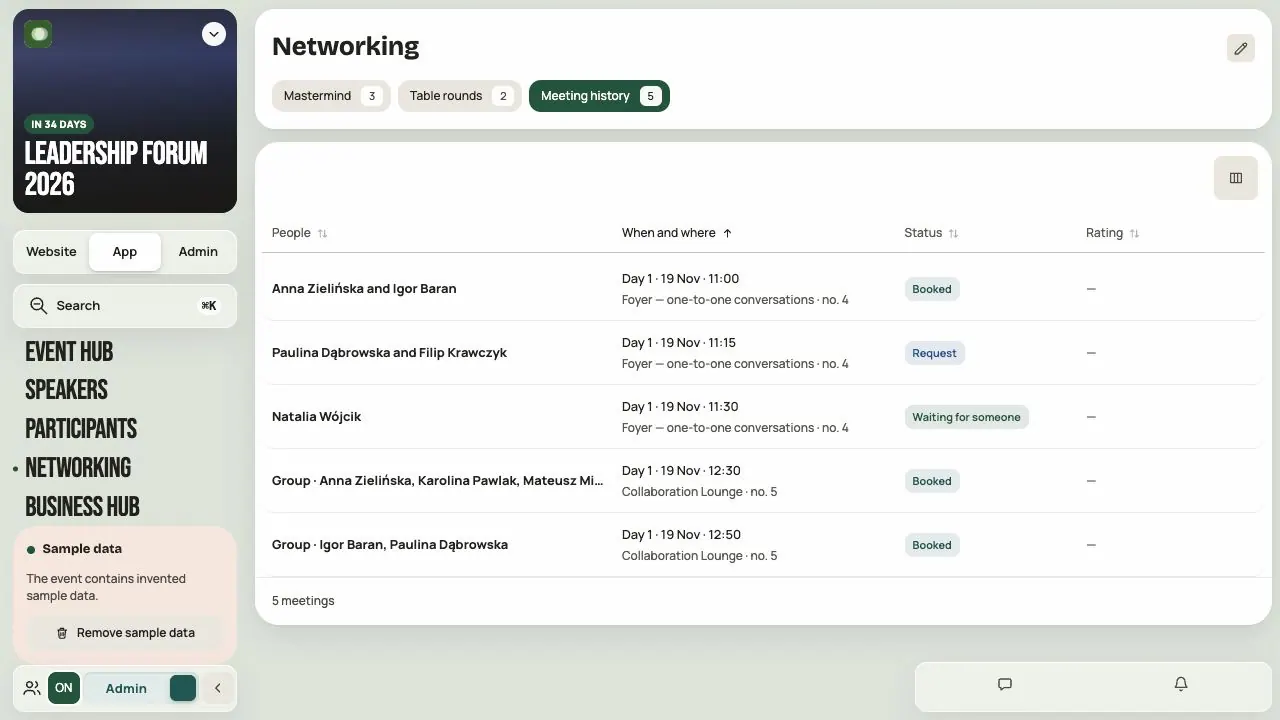
The Meeting history tab shows the people, time, place, state of each meeting and Booked by: the organizer or the participants themselves. Waiting, requested and booked are different stages. Don't count them as meetings that took place.
Use the status filters and Search for a person to narrow the table. Click a row for meeting details or a name for the profile.
Download CSV saves the rows currently shown, after filters and search. To download the full history, select all states and clear the search first. A Mastermind row represents a whole table, not every possible pair of people.
Participants can Reschedule a meeting. Until the other person agrees, the old time stays. After the meeting, a participant can confirm whether it happened and rate it. Others don't see their rating.
Delete table notifies the people signed up and the waitlist. Delete round can cancel booked meetings. You see how many before you confirm.
Before you open sign-ups
- Networking has active access, is on and is available to the right groups.
- Tables have specific topics, descriptions, times and limits.
- Hosts have photos and complete profiles.
- Place names match the signs in the room.
- Signing up and the waitlist are checked without Admin mode.
Frequently asked questions
A participant can't sign up
Check access to the module, that the person is in the event and shows their profile. Also check they don't have another table or meeting at that time. For 1:1 rounds, check whether Only you is set.
I can't choose a host or a person for a meeting
The list shows only participants with a visible profile. A speaker card alone isn't enough. The person must join the event and show their profile.
Does a duplicated table keep the people signed up?
No. The copy starts with no sign-ups.
Is someone on the waitlist guaranteed a seat?
No. They get a seat if someone leaves and they're free at that time.
Is an Event Hub meetup the same as a Networking table?
No. A meetup is an informal proposal under a post. Networking has seat limits, a waitlist and set times.
Read on
All articles →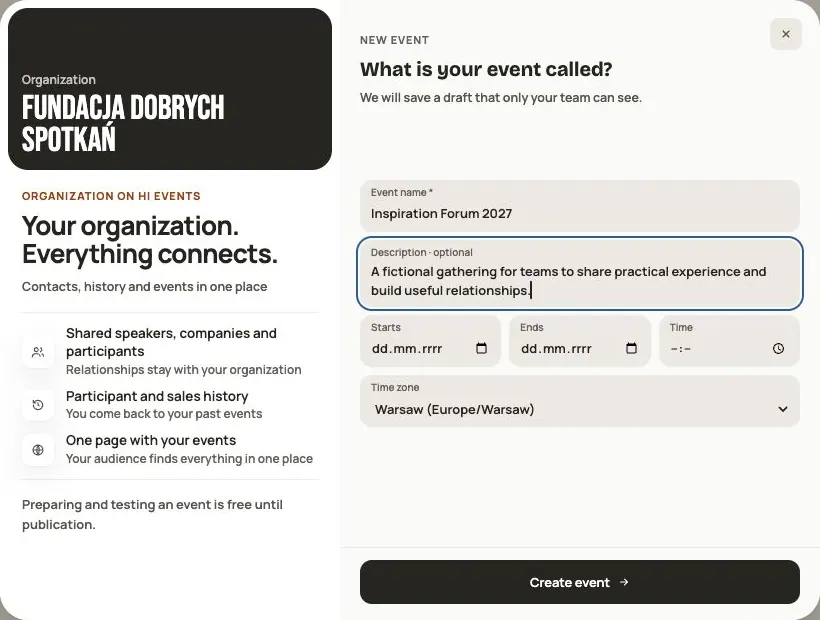 Help
Your first event, step by step
From draft to publication: name and dates, consents, tickets, content, modules, credits and the „Publish event” button.
 Help
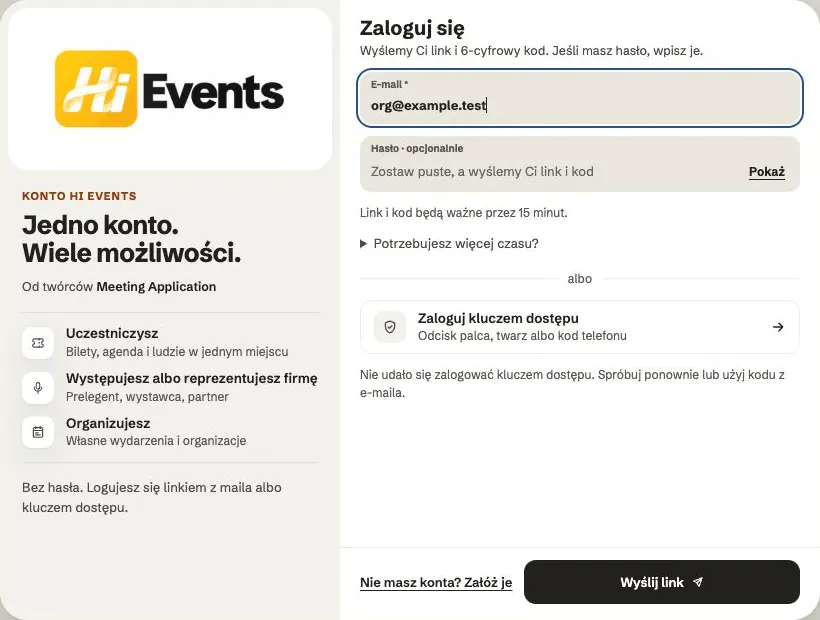
Signing in: link, code, password and passkey
Four ways to sign in to Hi Events, how to set or change your password, and how to sign in with your fingerprint.
 Help
Photos and files: formats and limits
Which photos you can add, how big they can be, and what to do when a file won't upload.