Promo — prepare banners and event referrals
Turn on Promo and choose roles, templates and discounts for friends. Participants, speakers and companies make banners and share the event with their own code.
Promo helps your guests recommend your event. You set the rules: who makes banners, which templates are available and which discounts can be shared. A participant, speaker or company picks a ready template, downloads the image and shares it with their own code.
Step 1. Open Promo
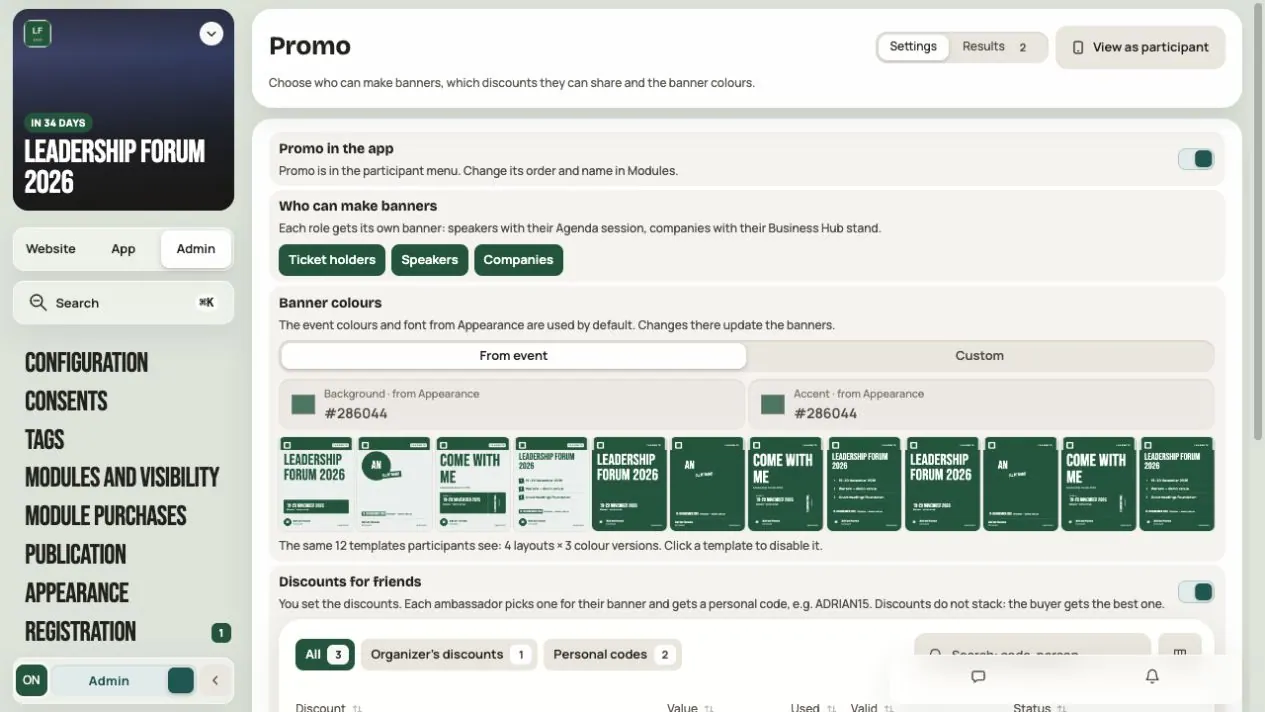
Go to Admin → Promo in your event.
- Settings — where you set the rules.
- Results — where you see the ambassador ranking.
Turn on Promo in the app. The module appears in the menu. You change its name, order and visibility for groups in Admin → Modules and visibility.
Step 2. Choose who can make banners
In Who can make banners, select the roles:
- Ticket holders
- Speakers
- Companies
A person must have that role in the event. Selecting a role doesn't make anyone a speaker or company manager. You assign those roles in Speakers and in Business Hub.
Note: Ticket holders doesn't currently check ticket purchase separately. Any participant of the event can make a banner.
Step 3. Set colours and templates
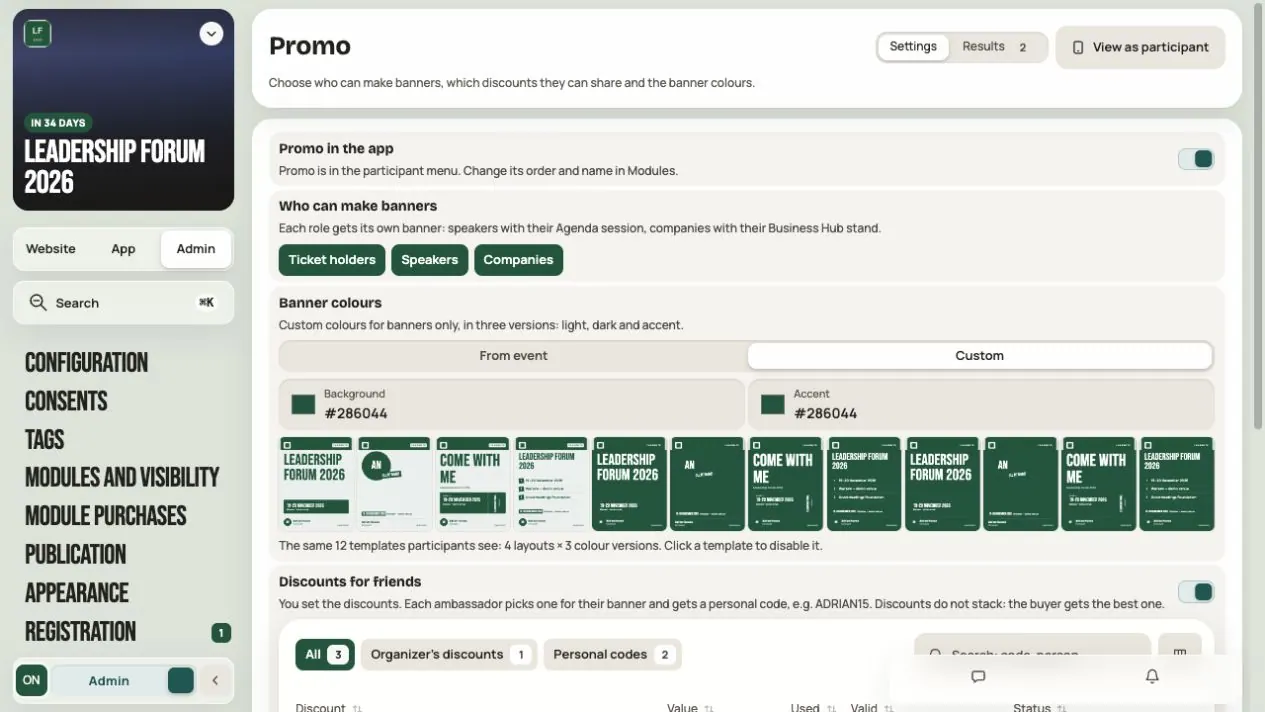
In Banner colours, choose:
- From event — banners use the colours and fonts from Appearance.
- Custom — you set a separate Background and Accent for banners only. The rest of the app doesn't change.
There are 12 templates: four layouts (Headline, Photo, Ticket, Three lines) in three colour versions. Click a thumbnail to turn a template off or on. At least one must stay on.
Changes save right away. Wait for Saved.
Step 4. Add discounts for friends
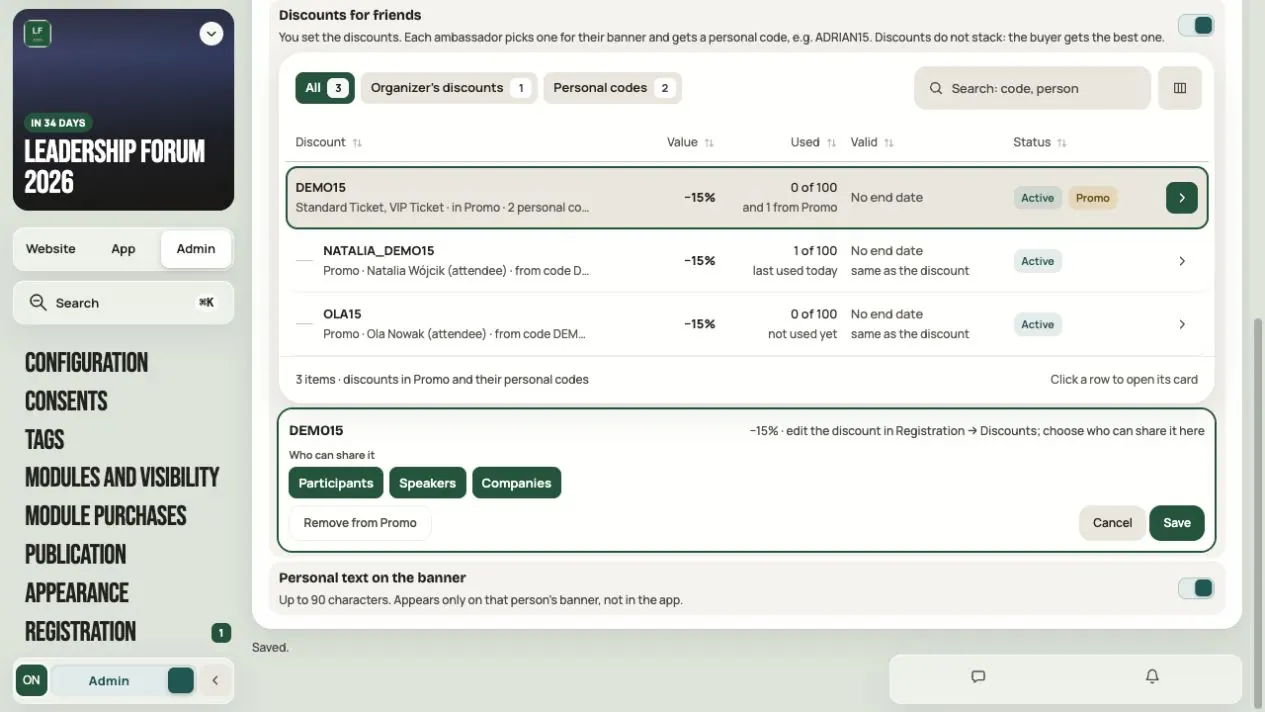
Turn on Discounts for friends if people who share the event should get their own codes.
Each person gets their own code for a given discount, e.g. ANNA_DEMO15 for the DEMO15 discount. They don't have to make it up. Next time they get the same code.
Click a discount row to change Who can share it. This is separate from Who can make banners.
You change a discount's amount, dates, limit and tickets in Admin → Registration → Discounts. Remove from Promo turns off the personal codes for that discount, but doesn't delete the discount from Registration.
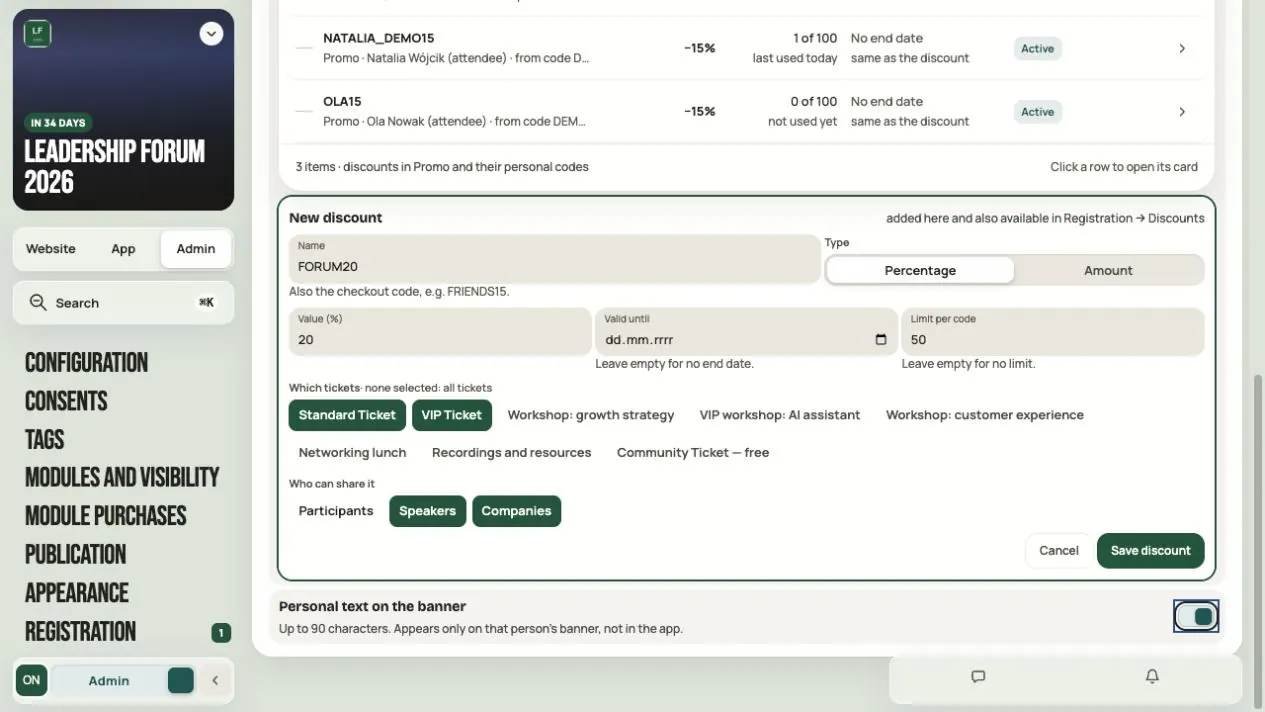
To add a new discount, click New discount:
| Field | What to enter |
|---|---|
| Name | This is also the checkout code: 3–32 characters, letters, digits, - or _ |
| Type and value | A percentage from 1 to 100 or an amount in złoty |
| Valid until | The last day, or leave empty |
| Limit per code | A number, or leave empty (no limit) |
| Which tickets | Selected tickets, or none selected (all) |
| Who can share it | At least one role |
Click Save discount. The new discount also appears in Registration.
- The limit applies to each code separately, not to all of them together.
- Discounts don't stack. Checkout picks the one that saves more.
- The discount doesn't apply to bundles or free items.
- If the discount was created but not shared, click Retry sharing.
- If the result is unknown, click Check creation result. Don't create a second discount straight away.
Step 5. Check what guests see
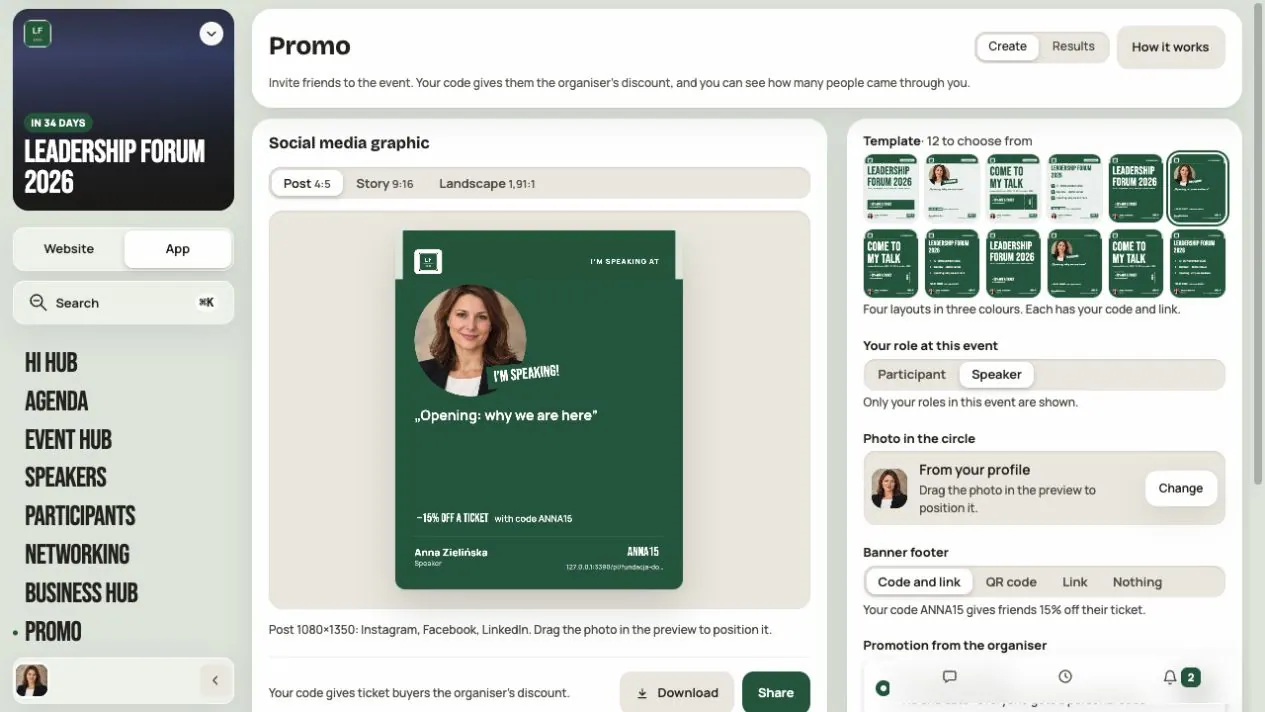
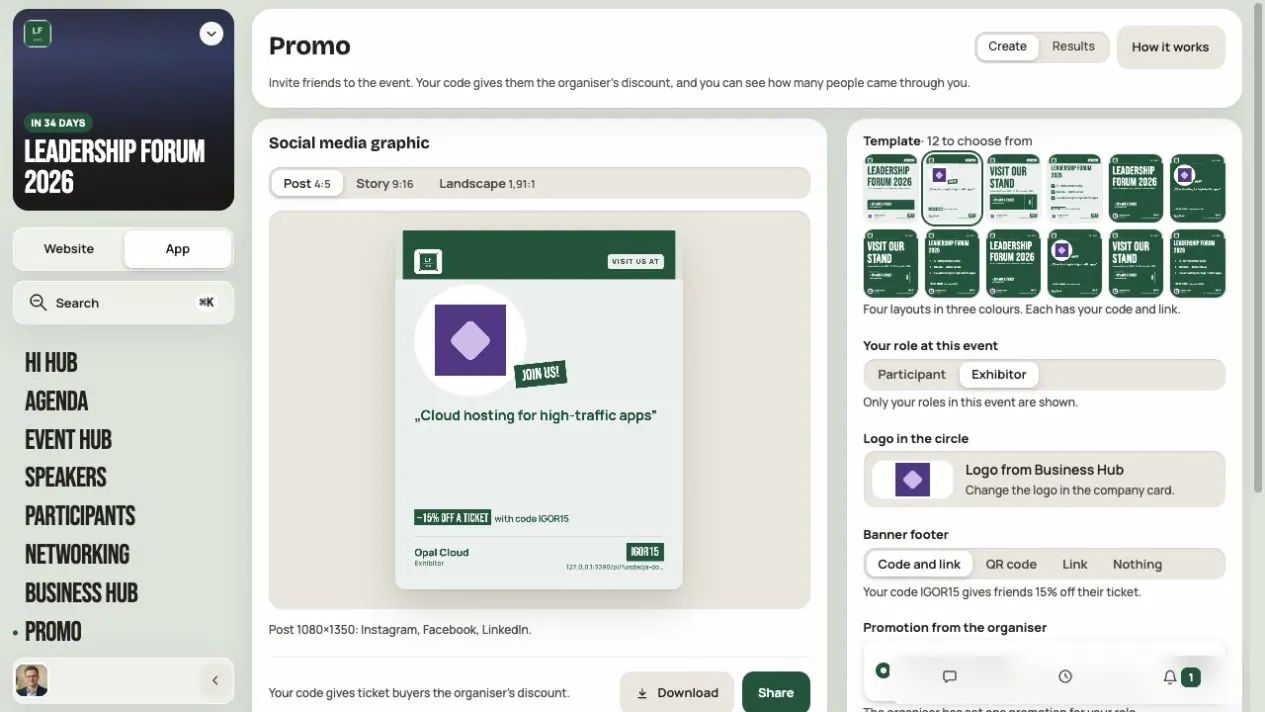
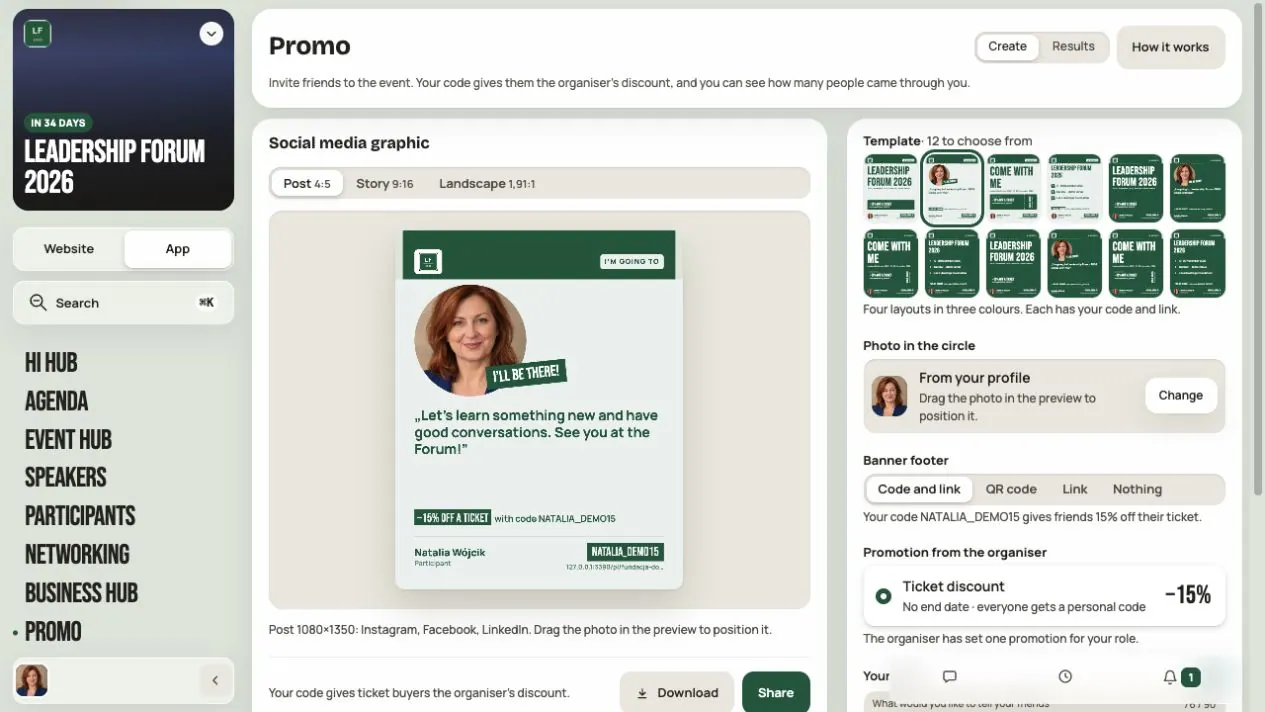
Click View as participant. The generator opens for your account, with your roles. To see a speaker's or company's banner, you need an account with that role.
What goes on the banner:
| Role | Data on the banner |
|---|---|
| Participant | First name, last name and photo from My profile |
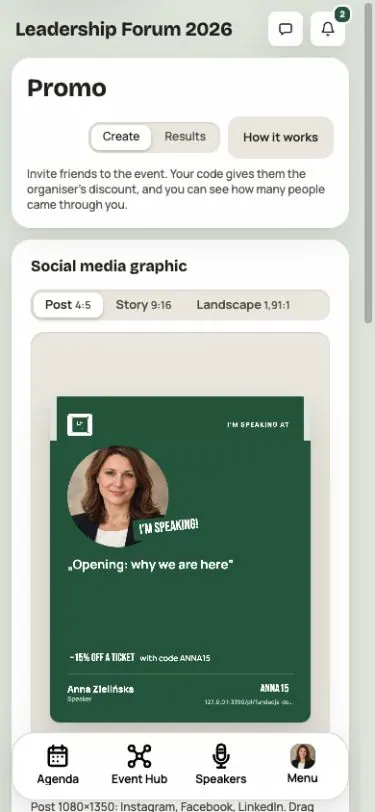
| Speaker | Name and photo from the speaker card and the first session from the Agenda |
| Exhibitor | Company name, logo and short description from Business Hub |
If something on the banner is wrong, fix it at the source: in the Agenda, Speakers or Business Hub. The generator doesn't edit this data.
Step 6. How guests make a banner
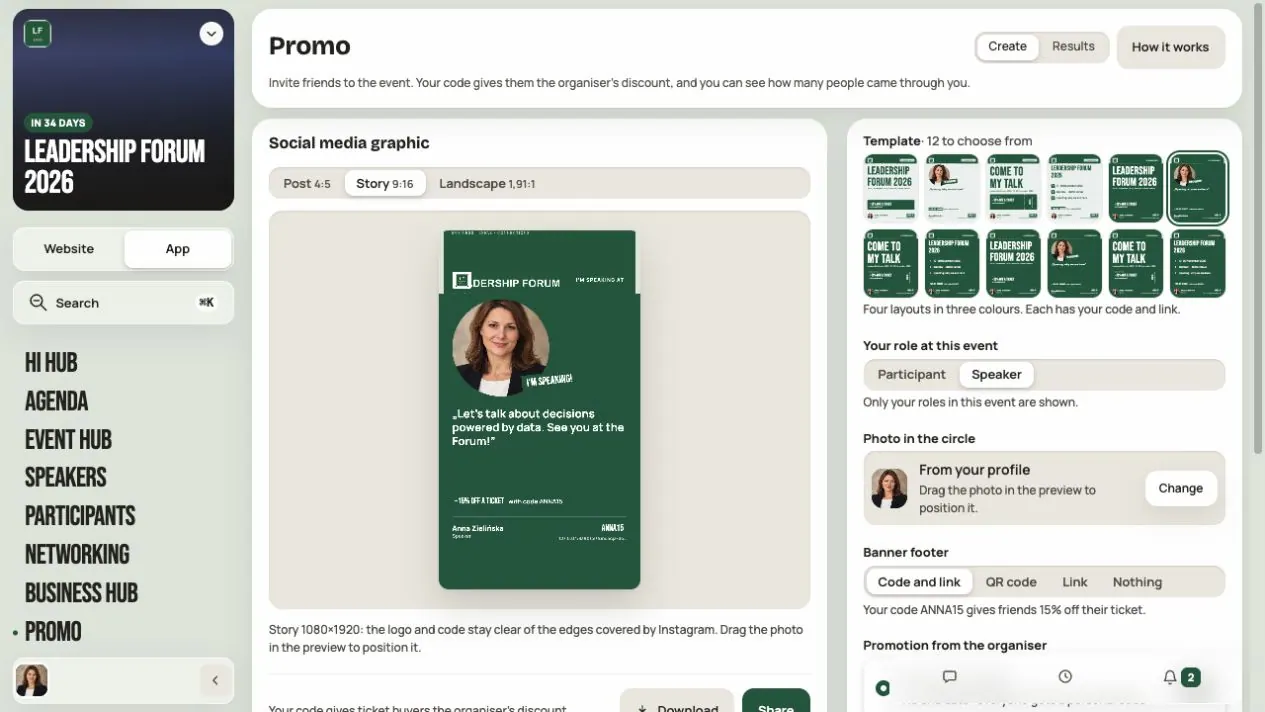
In the Create tab, the person chooses:
-
Format:
| Format | Size | For | |---|---|---| | Post | 1080 × 1350 | A social media post | | Story | 1080 × 1920 | A story on a phone | | Landscape | 1200 × 630 | A post with a link |
-
Template from the ones you leave on.
-
Photo — they move and zoom it in the preview.
-
Personal text on the banner — up to 90 characters, if you turn it on.
-
Banner footer: Code and link, QR code, Link or Nothing.
Important: only Code and link uses the personal code. QR code and Link lead to the general event page. For referrals with a discount, choose Code and link.
Check the material’s language
The generator’s controls and banner labels follow the PL or EN interface language. People’s own words — a personal sentence, name or company description — are not translated automatically. Event names and descriptions use the available content versions.
Changing language does not change the personal code or create a new promotion. Check the downloaded image again if you change language after preparing it.
Step 7. Downloading and sharing
- Download saves a PNG file of the current preview.
- Share next to the image uses the device’s capabilities: it shares an image and text, shares text with the link, or copies the address. Check the result before sending.
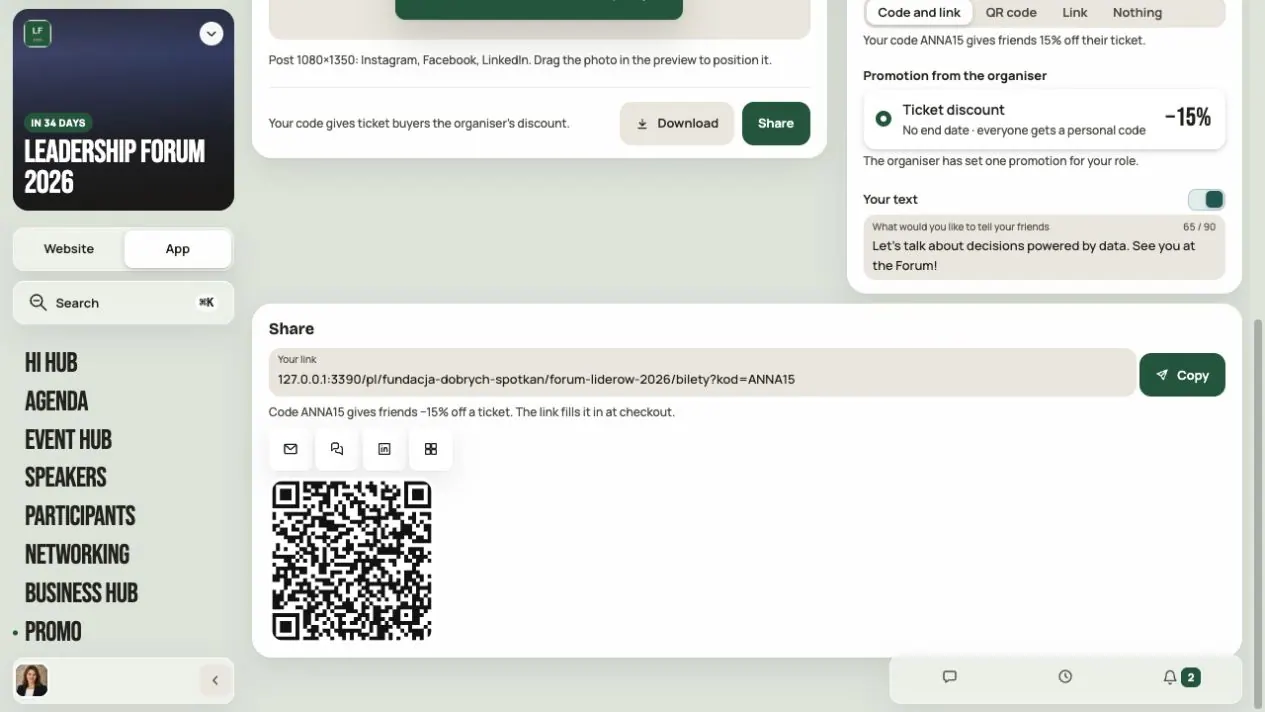
- The Share card below the generator has a Copy button and shortcuts to e-mail, WhatsApp and LinkedIn. They send the link, not the PNG file.
For an event with tickets, a code link opens checkout with the code filled in. Without a shop, the link opens the event page and joining flow. The actual discount depends on the current offer terms and basket.
The generator doesn't save projects. If a post and a story are needed, each format has to be downloaded separately.
Step 8. Check the results
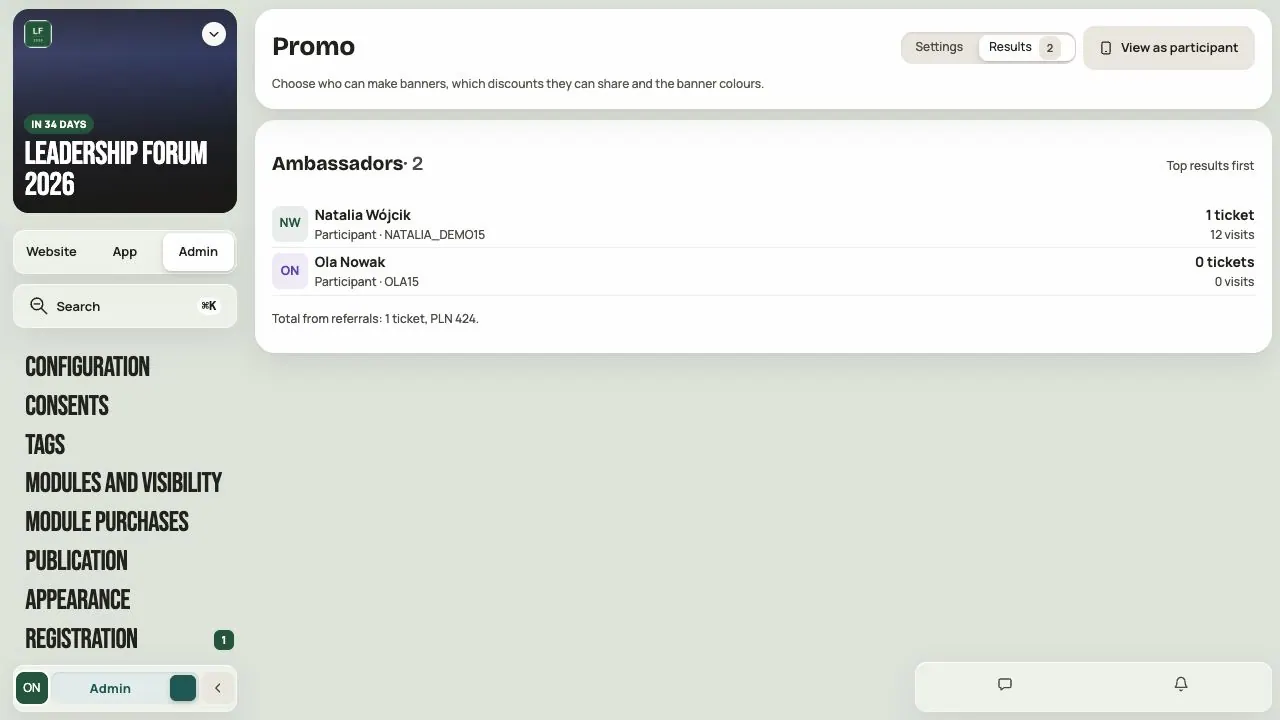
Go to Admin → Promo → Results. The Ambassadors ranking shows people, their codes, and their tickets and visits. People with the most tickets are at the top.
- The ranking includes up to 200 active ambassadors selected by orders and visits; the visible list is sorted by tickets and visits.
- A visit is an entry from a code, not the number of different people.
- The ranking doesn't count banner downloads or shares.
- Results refresh when you open the screen again.
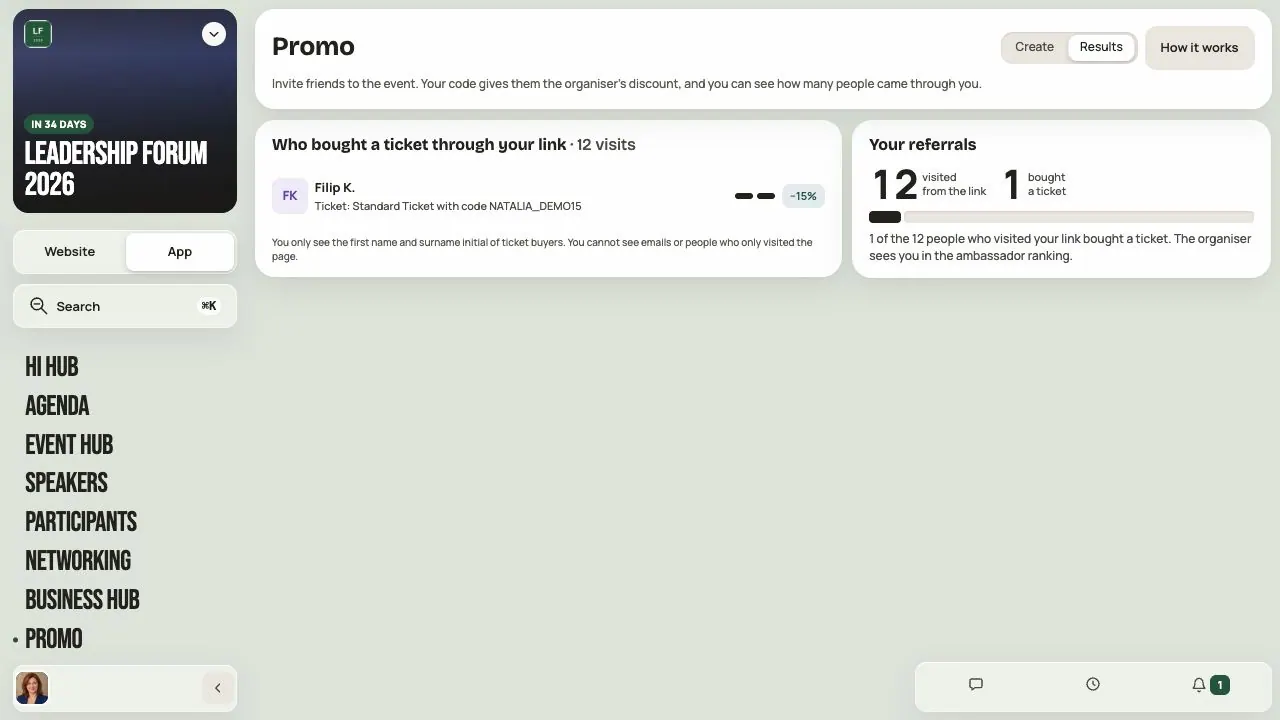
A person who shares the event sees their own results in the Results tab: visits, purchases and a list of up to 50 recent orders. Buyers are shown as a first name and the first letter of the last name, without an email. A purchase is an order and may contain several tickets. Results can include free and partially refunded orders; they are not a payout statement.
Before you share Promo
- Promo is on and the right roles can make banners.
- Speakers and company managers have their roles assigned.
- The templates left on are readable.
- The discount has the right amount, tickets, dates and limit.
- The person sharing can see their code.
- Code and link is chosen for referrals.
- The downloaded PNG is readable on a phone too.
Frequently asked questions
Is Promo the same as recommending Hi Events?
No. Promo recommends a specific event and its tickets. Recommending Hi Events to other organizers has separate rules.
Why don't I see a discount, even though I can make a banner?
Check that Discounts for friends is on, which role is chosen in the generator, and who can share that discount. The discount must be active and valid.
Can the personal code or the discount amount be changed?
Hi Events creates the code. You set the discount terms in Admin → Registration → Discounts.
Does the QR on the banner always give a discount?
No. QR code in the banner footer leads to the general event page. The QR with the personal code is in the Share card when Code and link is chosen.
Can I download a PDF?
No. The generator downloads PNG only.
Why does the banner say "made with Hi Events"?
It appears when the organization has the Free subscription.
Read on
All articles →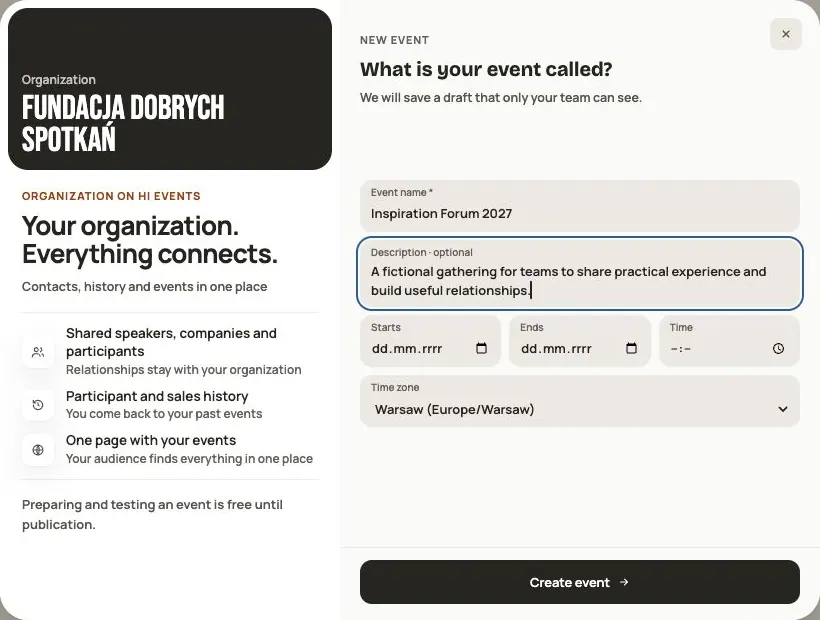 Help
Your first event, step by step
From draft to publication: name and dates, consents, tickets, content, modules, credits and the „Publish event” button.
 Help
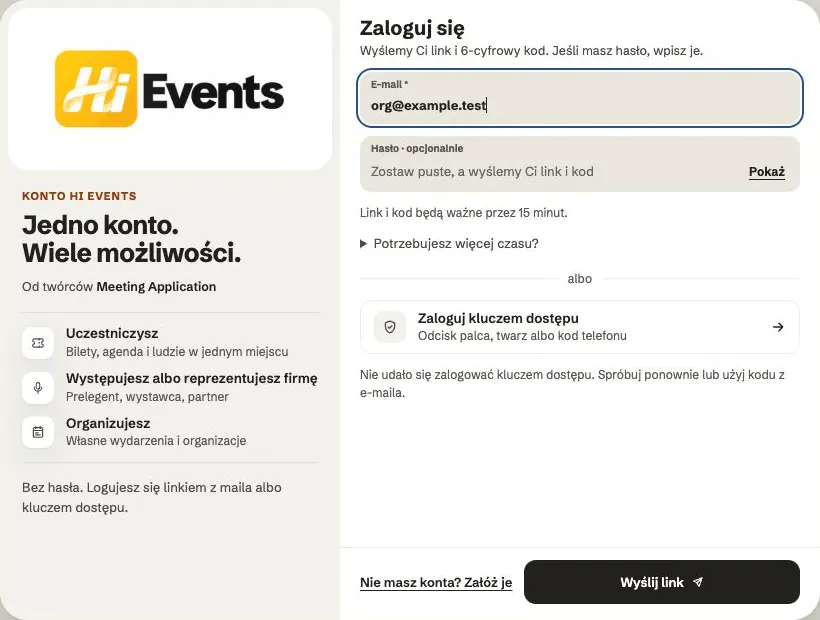
Signing in: link, code, password and passkey
Four ways to sign in to Hi Events, how to set or change your password, and how to sign in with your fingerprint.
 Help
Photos and files: formats and limits
Which photos you can add, how big they can be, and what to do when a file won't upload.