
How to build your event agenda
Add sessions and breaks, pin speakers and check the program the way a participant will see it.

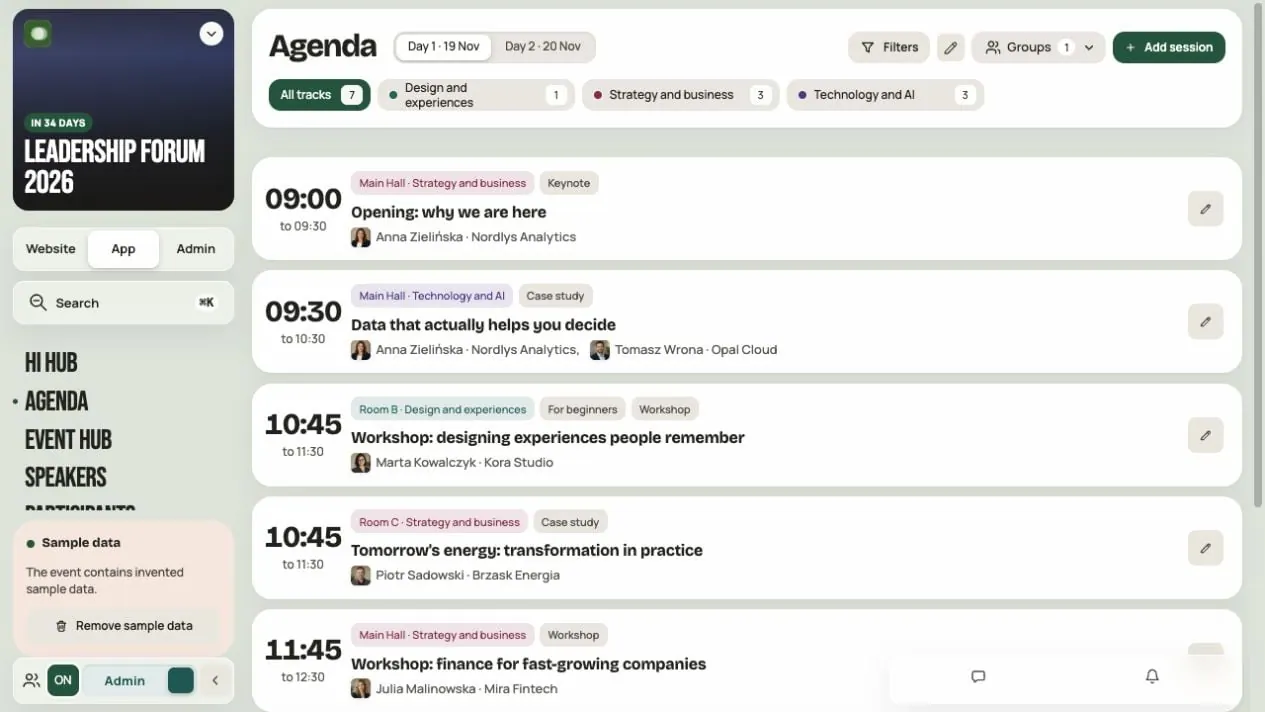
The Agenda is your event's program. You add sessions, breaks and speakers there. Participants see the finished program in the app and on the event website. Saved data is shared by the app and website, according to the viewer’s access. Refresh an already open program after changes.
This article is for event administrators and managers.
Step 1. Turn on Admin mode
- Open your event and go to App → Agenda.
- Turn on Admin mode.
You will see Add session, Agenda creator and Speakers, and pencils next to sessions. If they are missing, check that you have editing access to this event.
Step 2. Lay out a day with the Agenda creator (optional)
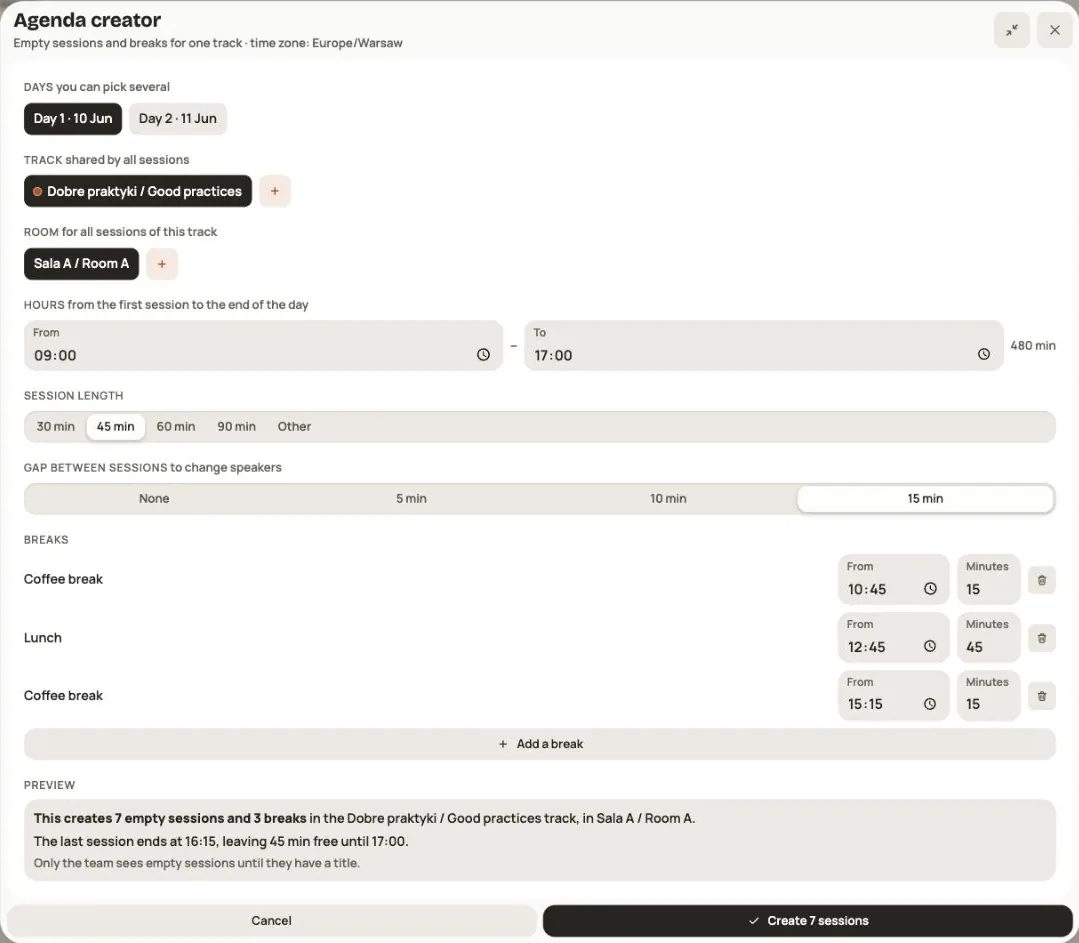
You know the times but not the titles yet? The Agenda creator makes empty sessions and breaks for one track in one go.
- Click Agenda creator.
- Choose Days (you can pick several), a Track and a Room.
- Set the Hours, Session length and Gap between sessions.
- Add Breaks, for example Coffee break or Lunch.
- Check the Preview and click the button that creates the sessions.
The creator skips times when the selected room is already occupied. It does not shorten a session to fit before a break or the end of the day. Check the number of skipped items in the preview. Run the creator again for another track or room.
Breaks have their own titles and are ready program items, subject to their visibility. A gap between sessions is only free time, with no separate program item. A break has no speakers and cannot be a workshop. Use As in the … track to copy break times from another track.
Empty sessions are marked Draft. Only the team sees them. Participants see a session only once you give it a title. If you don't like the result, click Undo.
Step 3. Add or complete a session
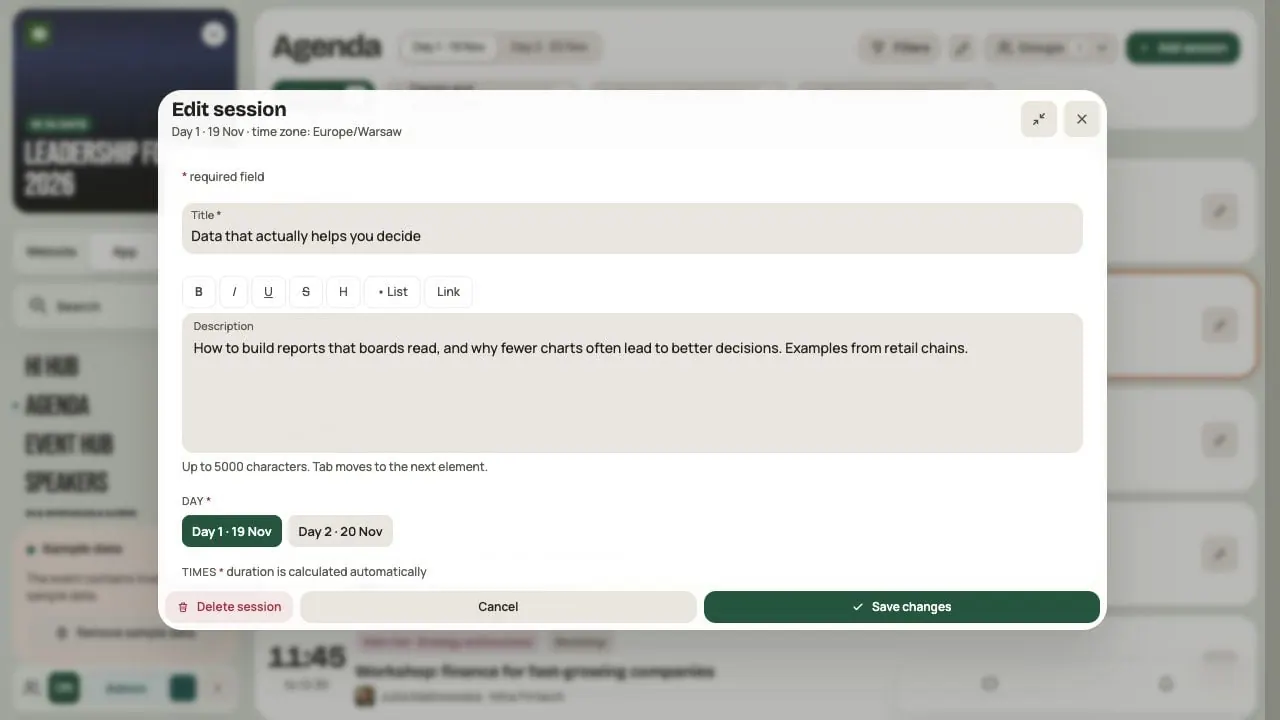
Click Add session or the pencil next to a draft. Fill in:
- Title, for example “Scaling product teams”. Without a title, the session stays a draft.
- Day and Times. The end must be after the start.
- Room / location. Add a missing room with the + button next to the field.
- Description: briefly, what the session is about and who it is for.
- Session type: Talk or Workshop.
- Click Add session. When editing, click Save changes.
Expand gives the form more room.
When you change the end time: Hi Events may ask about shifting later items on the same day and track. If the session has no track, it considers later items without a track in the same room. These are items starting at or after the previous end time; a block moves together with its child sessions. Choose Move the next ones or Only this session. Check the new program end time in the question.
Step 4. Organize the program
| Field | What it means | Example |
|---|---|---|
| Room / location | Where the session is | Main Hall, Foyer |
| Track | A strand of the program | Strategy, Technology |
| Labels | Extra topics for filtering | AI, For beginners |
You add a new name from the form. After that, pick it from the list so you don't end up with two versions of the same room. The room also connects the agenda to Map: assign the same room to an outline on the venue plan. Session details in the app show Show on map when the viewer has Map access and the room is drawn on it. This button is not part of the public session page. See How to prepare a venue map.
If another session is already in the same room at that time, the form warns you. You can still save, but it is usually better to fix the time or room.
Step 5. Pin speakers
There are two ways:
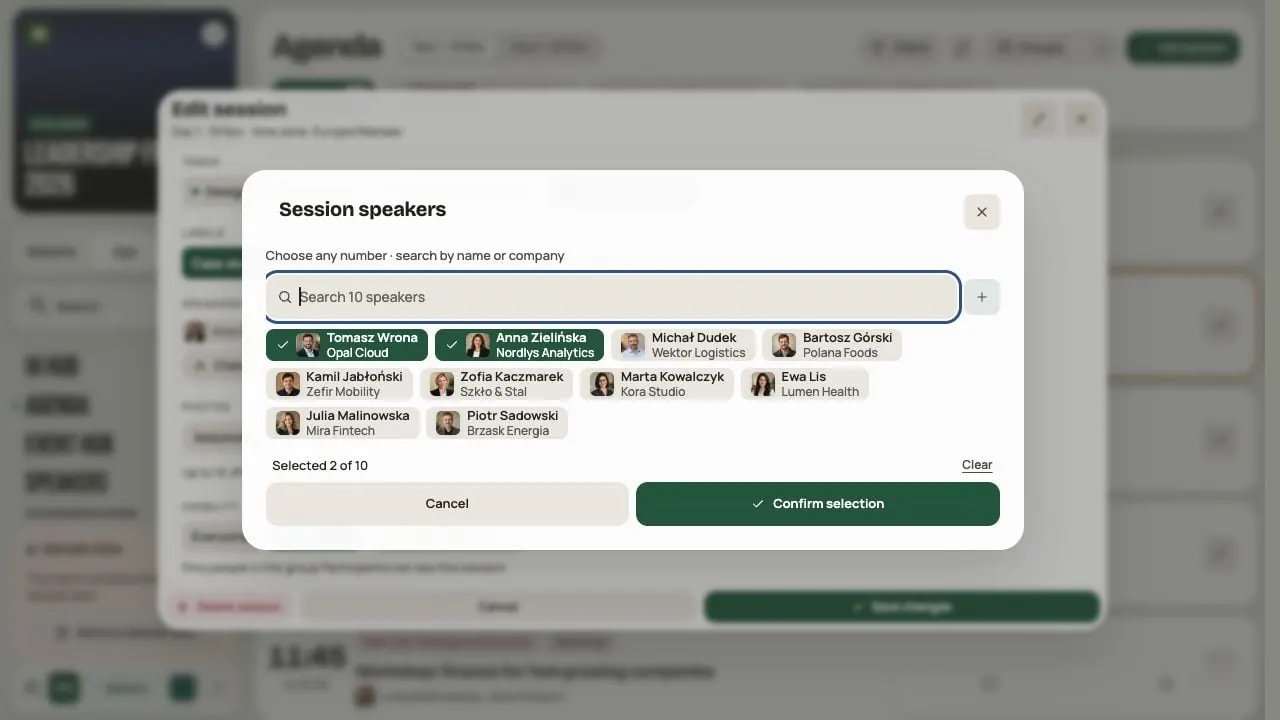
- In the session form. In Speakers, select the people and click Confirm selection. Search by name or company. If someone is missing, click New speaker. A first and last name are enough to start.
- In the speaker list. Click Speakers above the agenda. Drag a person onto a session. On a phone, tap Add a speaker on the session. The list shows who already has sessions, who has No sessions and whose invitation is pending.
One person can have several sessions. If someone has two sessions at the same time, you see a warning. The session shows the speaker and the speaker card shows the session. You never type anything twice.
If you ask a speaker for their talk title in the invitation, the session shows “Waiting for a title from…”. See How to add speakers and invite them to work with you.
Step 6. Choose who sees the session
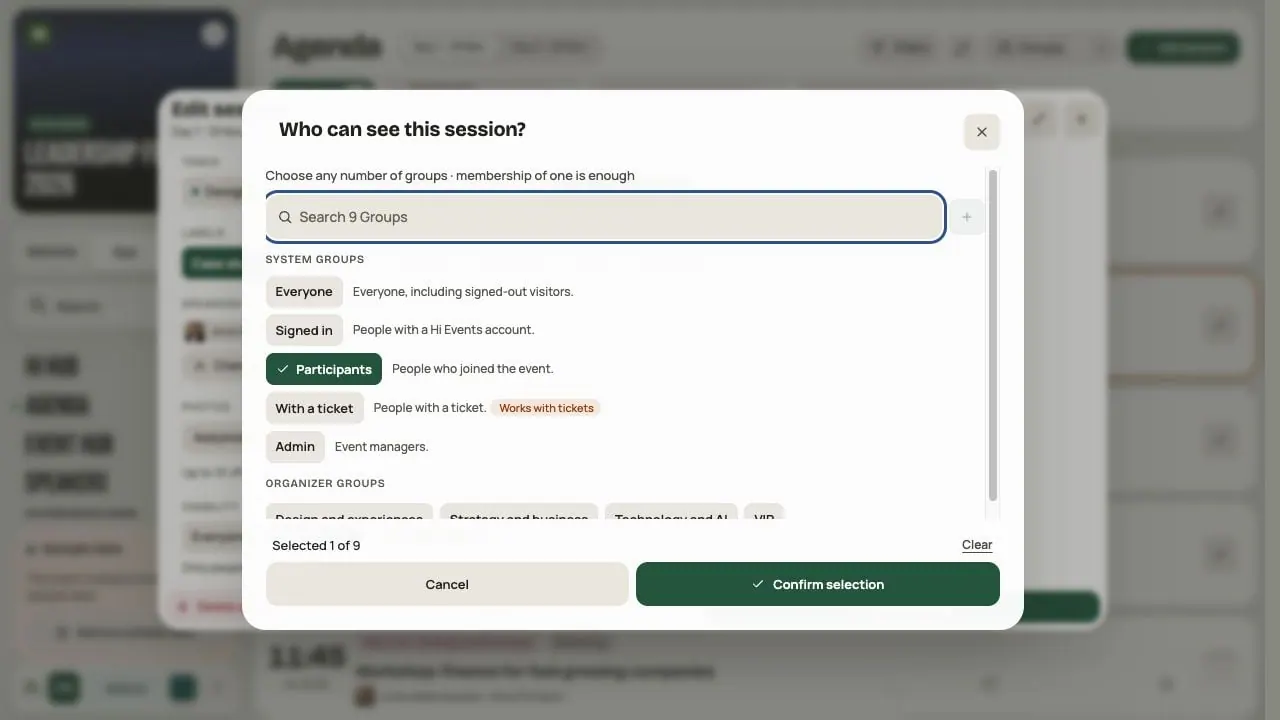
In Visibility, choose Everyone or specific groups. With several groups, belonging to one is enough.
Example: the VIP breakfast is for the VIP group and the opening is for everyone. One program is enough.
Remember the two levels of access. A participant needs access to the Agenda module and to the session itself. You set the module's groups in Admin → Modules and visibility. You add your own groups in Admin → Tags.
Step 7. Group short talks into a block
A block is useful for a series of pitches. In the form, tick Session block, save it, then click Add child session.
Sessions in a block have the same day and room as the block. Their times must fit inside the block's times. You can't delete a block that still has sessions in it. Delete or move the child sessions first.
Step 8. Questions and ratings
The session form has Questions to speakers and Session ratings. Keep the “As in the agenda” setting or choose On or Off for this session.
You change the settings for the whole Agenda with the Edit module pencil next to the heading. For questions, you choose whether new questions are Visible at once or shown After approval.
Step 9. Add photos and check the result
In Photos you can add up to 10 photos: JPG, PNG or WebP, up to 5 MB each. Wait for the upload to finish before you save the session.
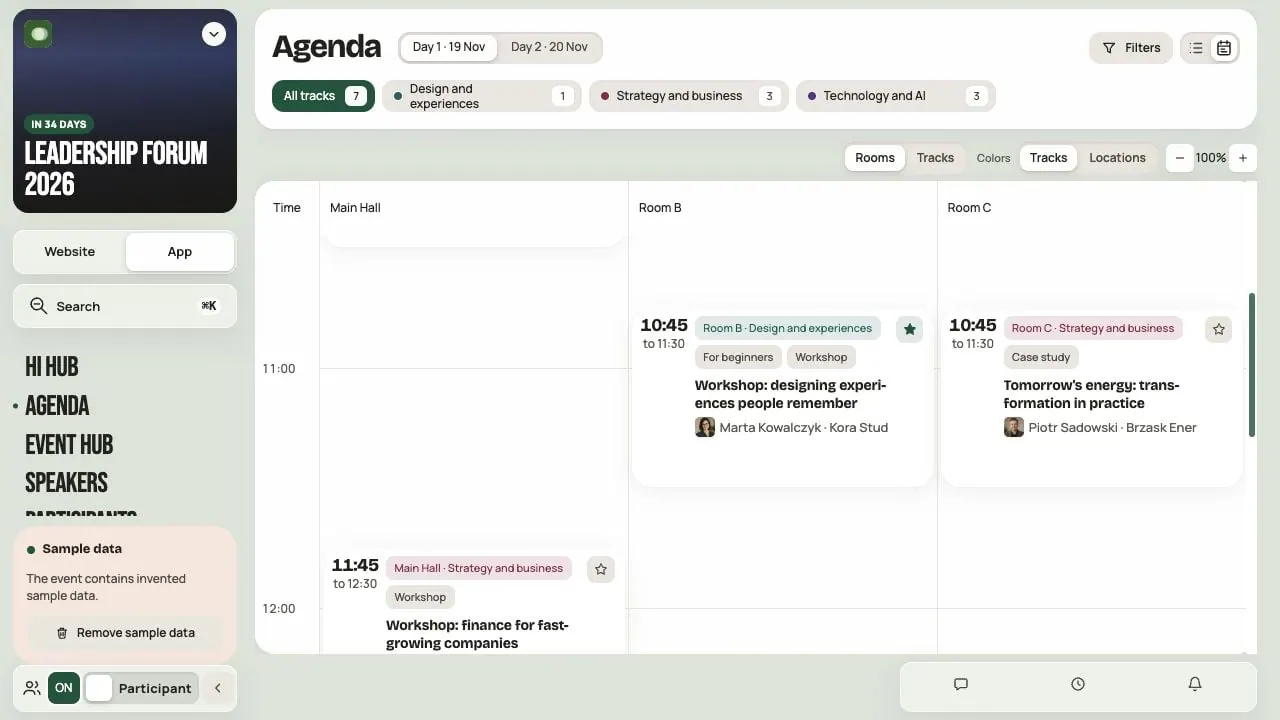
Finally, turn off Admin mode. Switch the view to Calendar to compare rooms and tracks. To see the program the way a specific group does, use Preview as a group.
A program in two languages
If the event has a second language enabled, the form has language tabs. Enter Title and Description separately. Switching tabs retains your input; save the form after completing the versions.
Day, times, room, track, labels, speakers, photos and audience are shared. Change them on the primary-language tab. Do not create a second session just to add a translation. Missing secondary text may display content from an available language; this is not automatic translation.
A regular session’s draft status depends on its primary-language title. Blocks and breaks require a title. A translated title alone does not replace the primary one.
Networking in the Agenda
If you have the Networking module, its rounds can appear in the Agenda. Turn this on in the Networking settings: Show the rounds in the Agenda. The rounds are then marked 1:1 rounds, Group meetings or Mastermind. Participants can filter the program by Type. You edit the rounds in Networking, not in the Agenda.
Before you share the program
- Every session has a title, day, times and room. No drafts are left that should be visible.
- Room conflicts are checked.
- Speakers are pinned to the right sessions.
- Module and session visibility match the audience.
Frequently asked questions
I can't see a session after turning off Admin mode
Check that the session has a title. Only the team sees drafts. Also check the selected day, the filters, the session's groups and access to the Agenda module.
Do I have to add a speaker separately in Agenda and in Speakers?
No. It is the same speaker card. You can complete a person added from the Agenda later in the Speakers module.
What happens if I remove the title of a saved session?
The session becomes a draft again. Participants no longer see it, and it also disappears from the plans of people who saved it. It comes back once it has a title again.
The creator made too many sessions. How do I undo it?
Click Undo in the message shown after creating them. Only untouched items from this creator run are removed. Sessions and breaks that someone edited or added a speaker or photo to stay. Undo does not delete the earlier program.
I don't see a save confirmation
Click Retry save. Retrying with the same details does not create a second session.
Read on
All articles →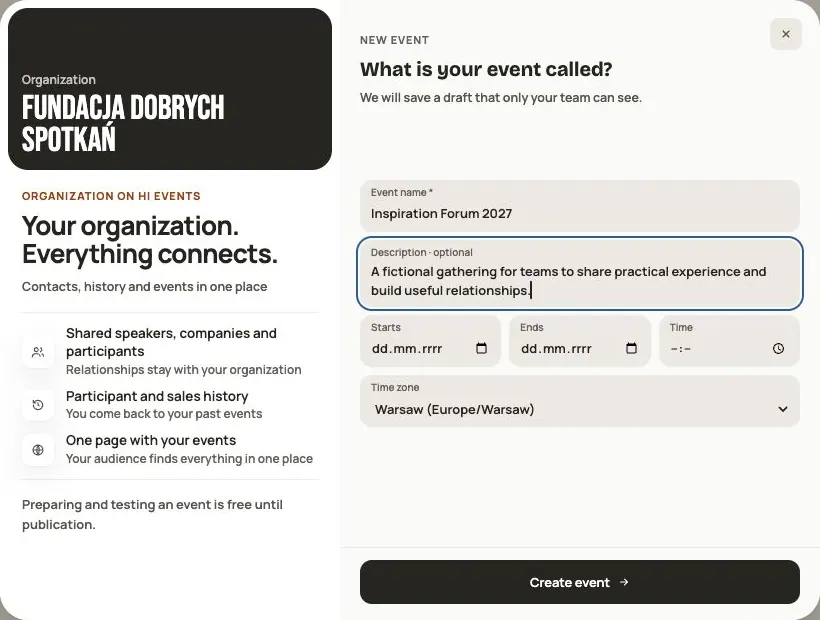 Help
Your first event, step by step
From draft to publication: name and dates, consents, tickets, content, modules, credits and the „Publish event” button.
 Help
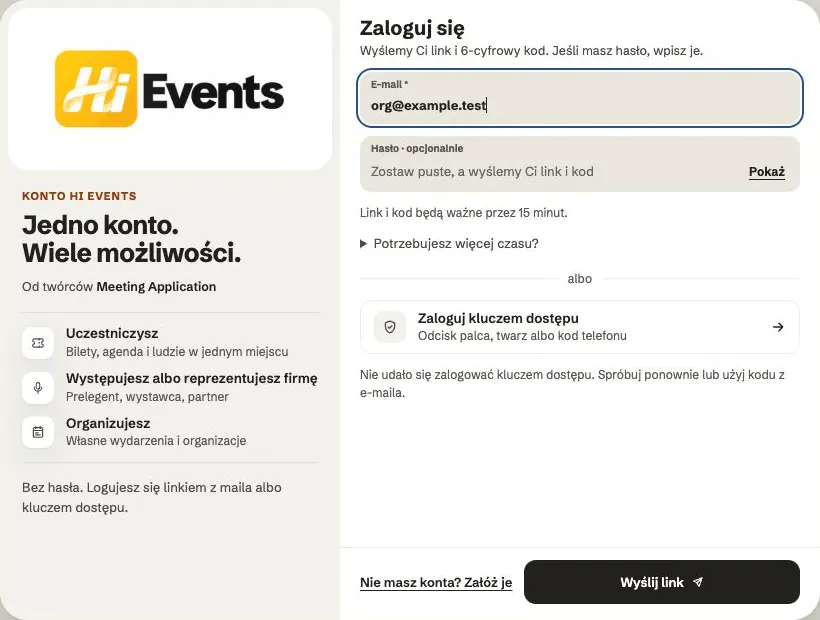
Signing in: link, code, password and passkey
Four ways to sign in to Hi Events, how to set or change your password, and how to sign in with your fingerprint.
 Help
Photos and files: formats and limits
Which photos you can add, how big they can be, and what to do when a file won't upload.