
Registration and tickets — build your offer and handle sign-ups
Add tickets, workshops, add-ons and bundles, set the sales rules and handle orders, applications, refunds and the waiting list.

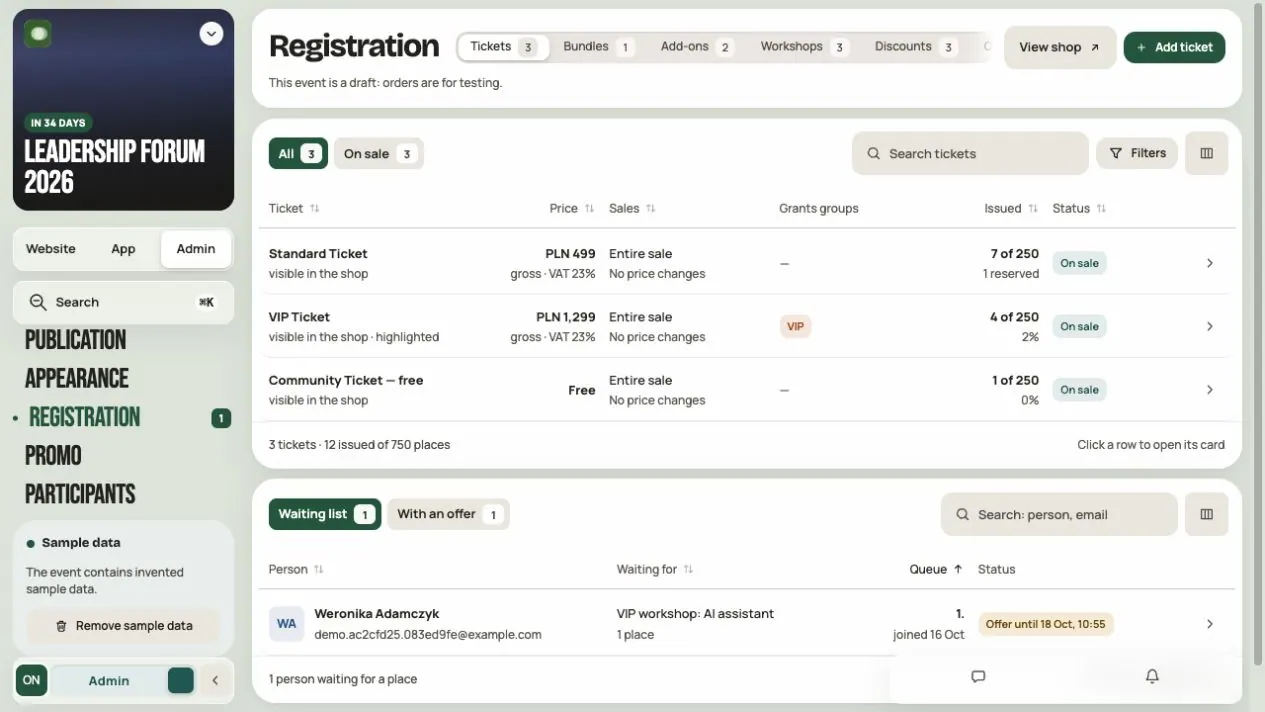
In Registration you set up tickets, workshops, add-ons and bundles. You also handle orders, applications and the waiting list here.
Everything is in Admin → Registration. The tabs are Tickets, Bundles, Add-ons, Workshops, Discounts, Orders and Sales settings.
Important: ticket payments are simulated for now. Nobody is charged and refunds do not reach a bank. KSeF invoices are in preparation. In an event draft, all orders are test orders and disappear when you publish.
What it costs
- A paid ticket doesn't use credits. We take a commission on sales that depends on your subscription: Free 5%, Standard 4%, Pro 3%, Dedicated 2%.
- A free ticket uses 1 credit for each person who claims it (2 credits on the Free subscription).
See Pricing, credits and subscriptions.
Step 1. Add a ticket
- In the Tickets tab, click Add ticket.
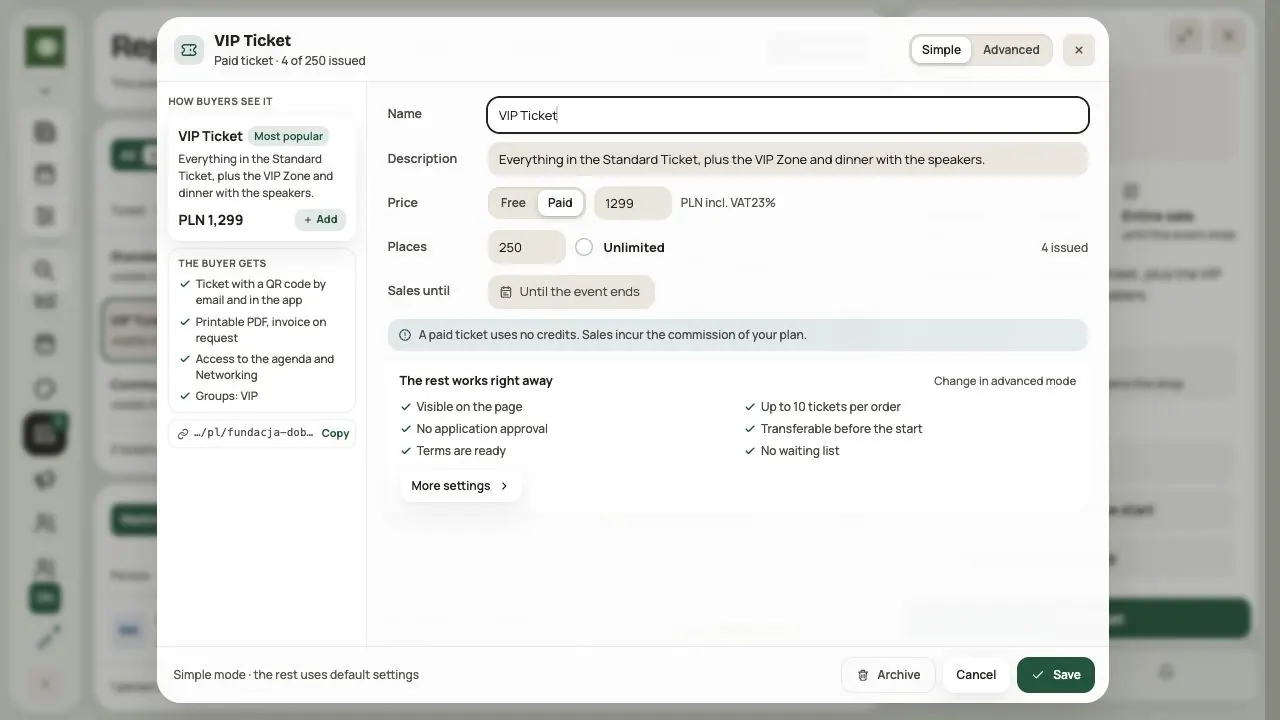
- Enter a name, description, price, number of places and the end of sales.
- Check the preview next to it and save.
The description should answer “what does this ticket include?”. For VIP, list specific benefits, for example access to the VIP area and meeting the speakers.
A price of 0 means free registration. The participant doesn't pay but still gives their details and accepts the documents.
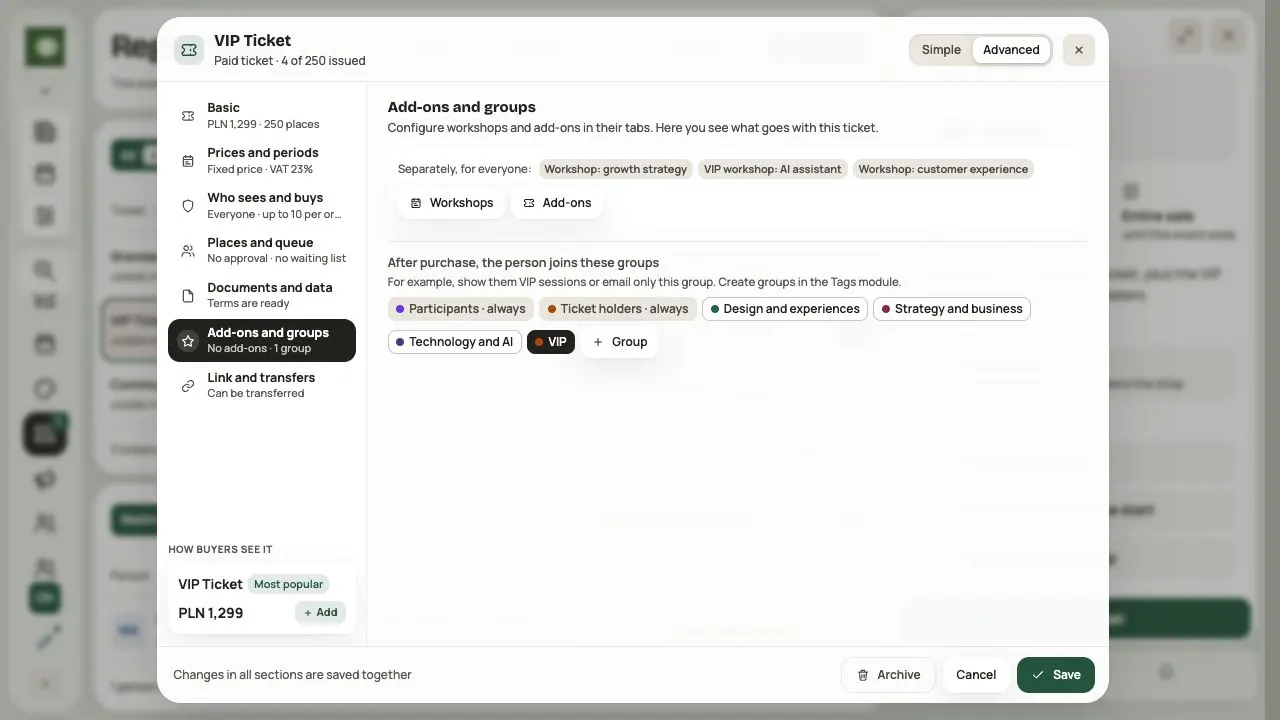
Advanced mode splits the settings into parts: Basic, Prices and periods, Who sees and buys, Places and queue, Documents and data, Add-ons and groups and Link and transfers. Examples:
- Prices and periods: the price can rise over time. Buyers see when the price will increase. You also set the VAT rate here. Shop prices are gross.
- Who sees and buys: the ticket is in the shop, only via a link, or only for selected groups.
- Places and queue: a waiting list, or approving each application.
Prepare the offer in a second language
If the event has two content languages, switch PL / EN in the ticket, workshop, add-on or bundle editor. Complete the name and description; tickets and workshops also have benefit texts and price-period names. Prices, dates, limits and links are shared and are edited in the primary version. Saving includes the prepared language versions.
The Missing EN or Missing PL badge helps identify untranslated items. Adding a second version does not translate the text. Check both shop languages separately.
Step 2. Connect the ticket to a group
In Add-ons and groups, choose Groups granted after purchase. Example: the VIP ticket grants the VIP group.
A group opens nothing on its own. You set VIP sessions, channels or emails in the relevant modules. See Participants and groups.
Step 3. Decide whether the ticket can be transferred
In Link and transfers you decide whether the holder can pass the ticket to someone else. By default a new ticket has No transfers.
When you turn on Can be transferred, the holder can transfer the ticket until the event starts, in their profile (Tickets and payments). The old QR code then stops working and the new person gets their own.
Step 4. Add workshops and add-ons
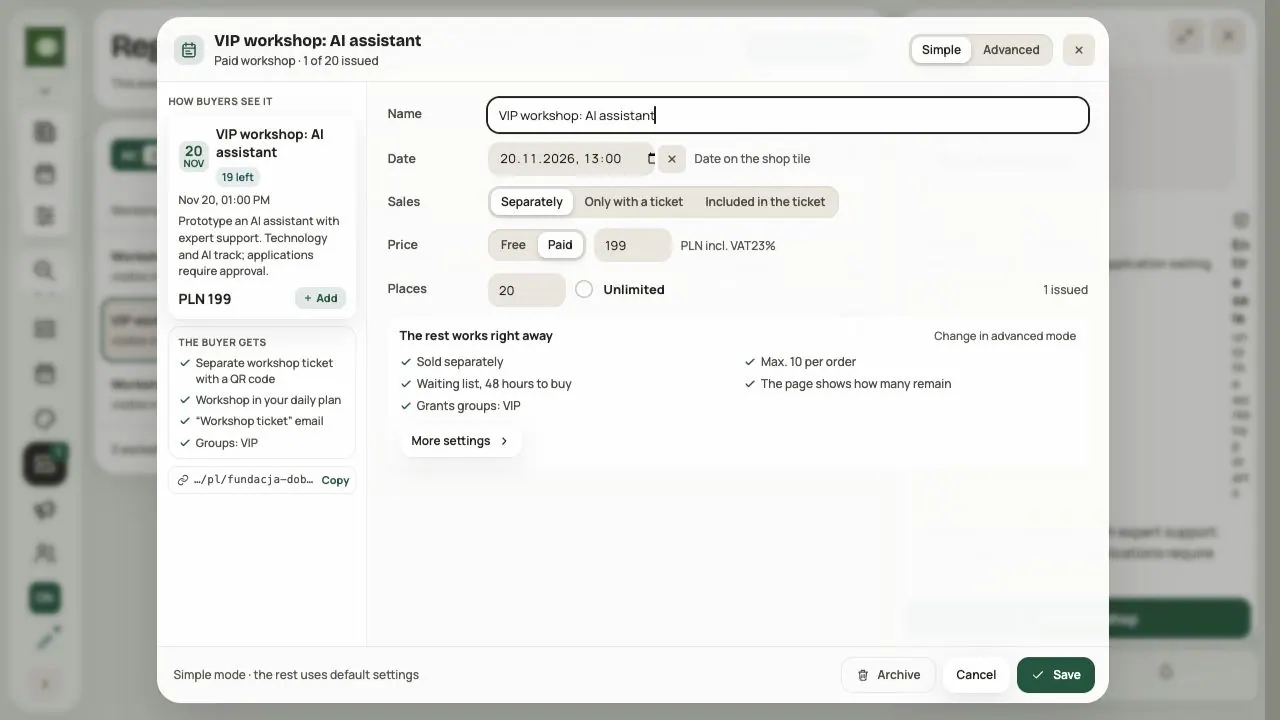
A workshop has its own time, number of places and sign-up rules. Click Add workshop. Say what participants will learn and set the number of places. Compare the time with the Agenda.
An add-on is, for example, recordings or lunch. It can be sold:
- Separately,
- Only with a ticket,
- Included in the ticket.
Don't sell again what's already included in the ticket price.
Add-on photo and variants
In the add-on editor, use Add photo or Change photo. Adjust the square crop and save the whole add-on. Confirming the crop alone does not save the offer. Without a photo, the icon remains.
Under Variants, add options such as T-shirt sizes. Enter the stock for each; the total must be at least 1. Buyers choose a variant when adding it to the cart. The selected size appears in the order and on the QR coupon. The add-on price and rules are shared.
Step 5. Create bundles and discounts
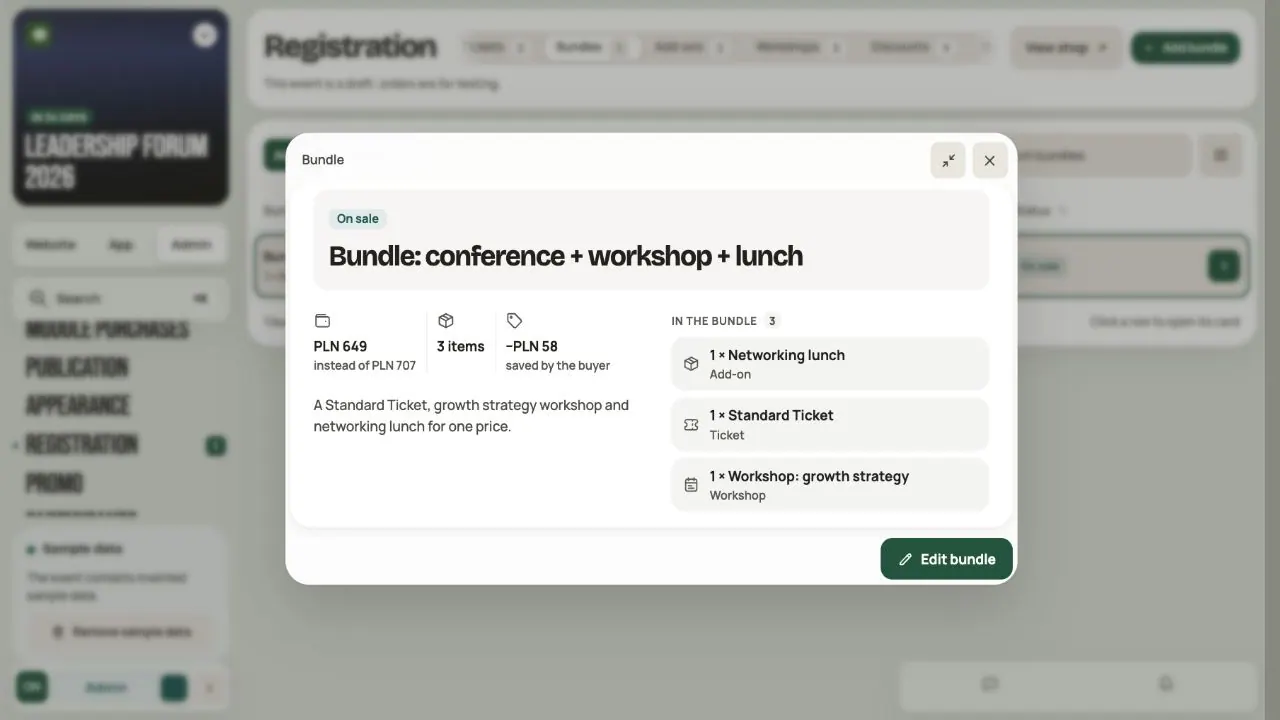
A bundle combines several items into one offer, for example a ticket, a workshop and lunch. Each person in the bundle gets their own ticket with a QR code. Discount codes don't apply to bundles.
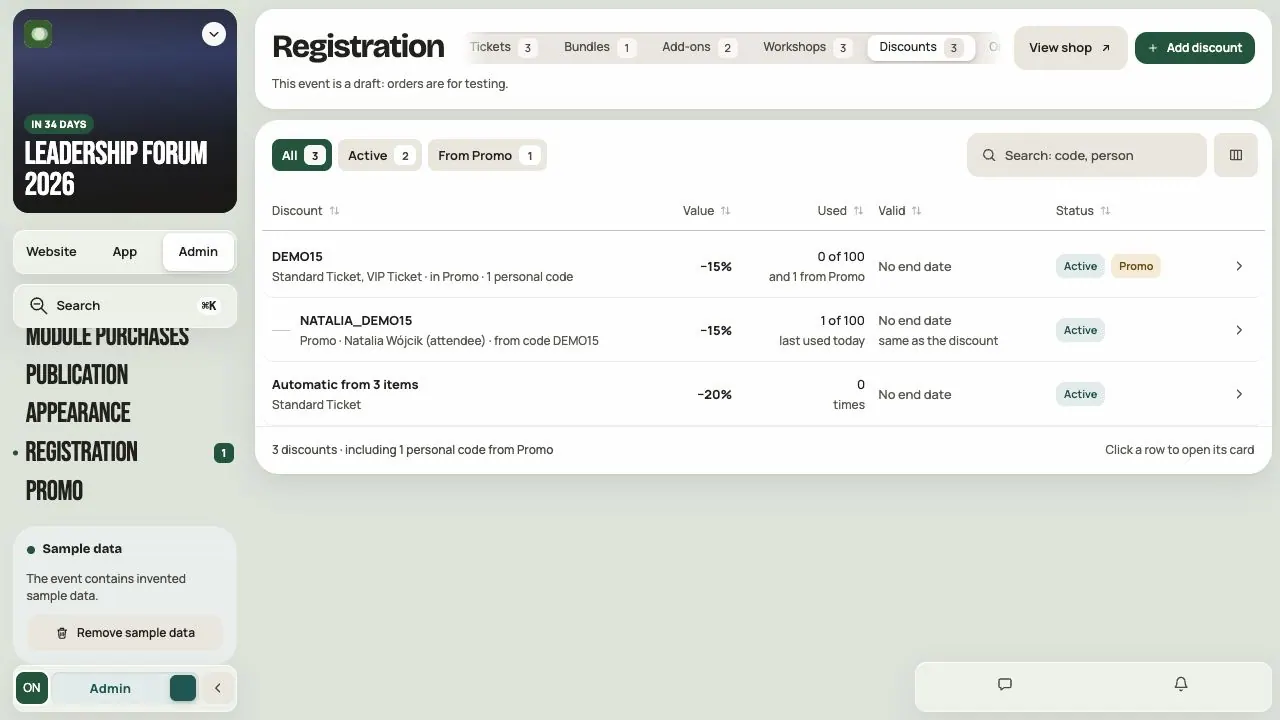
In Discounts you can add:
- a code the buyer enters in the cart or gets in a link (3–32 characters: letters, digits, - or _),
- an automatic discount from a set number of tickets.
Discounts don't add up. When several match, the buyer gets the best one. A ticket reduced to 0 uses 1 credit, or 2 credits on Free.
Step 6. Set the sales rules
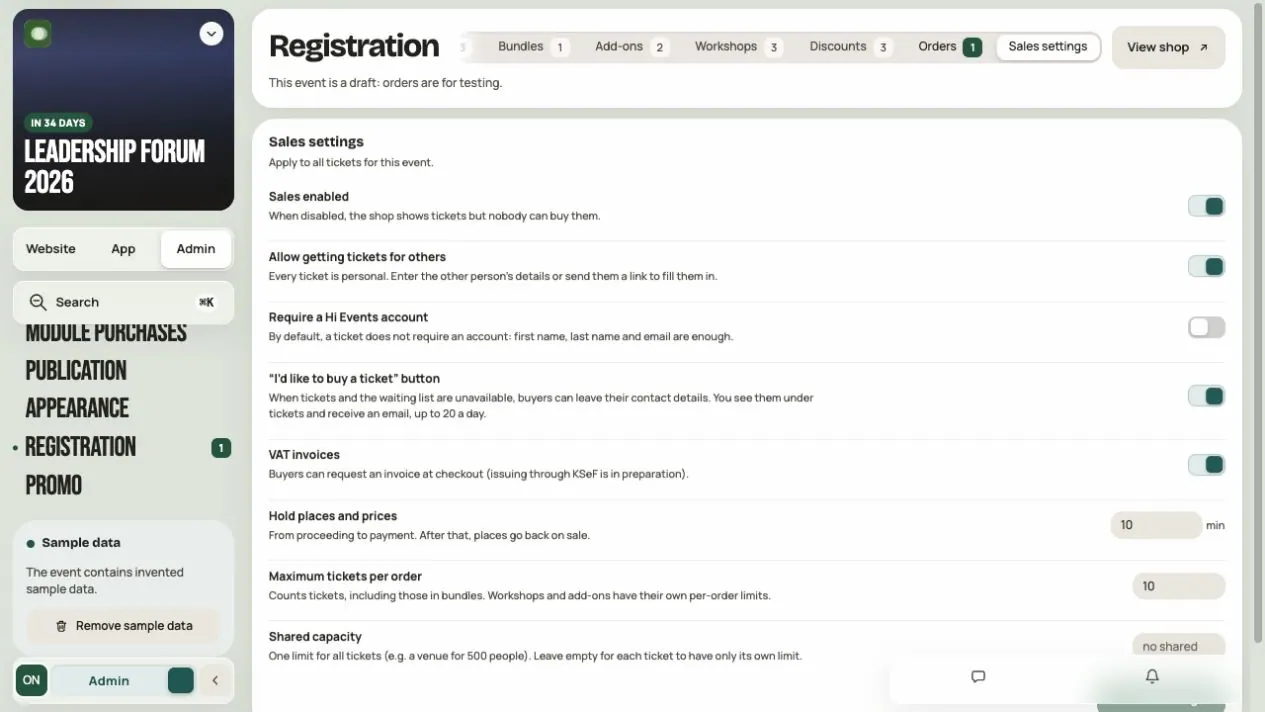
In Sales settings:
| Setting | What it means |
|---|---|
| Buying for others | Whether one person can buy tickets for others |
| Require an account | Whether the buyer has to sign in |
| Hold places and prices | How many minutes (5–60) a place is held from proceeding to payment |
| Order limit | How many tickets in one order |
| Shared pool | One limit for all tickets, for example a hall for 300 people |
| VAT invoices | An “I want a VAT invoice” field at checkout. Issuing through KSeF is in preparation |
Example: Standard has 250 places and VIP has 250, but the hall holds 300. Set a shared pool of 300.
You can't sell a ticket without the sale terms, and nobody can claim a ticket without the event terms. You publish both, and the privacy policy, in Admin → Consents.
Step 7. Go through the buyer's journey
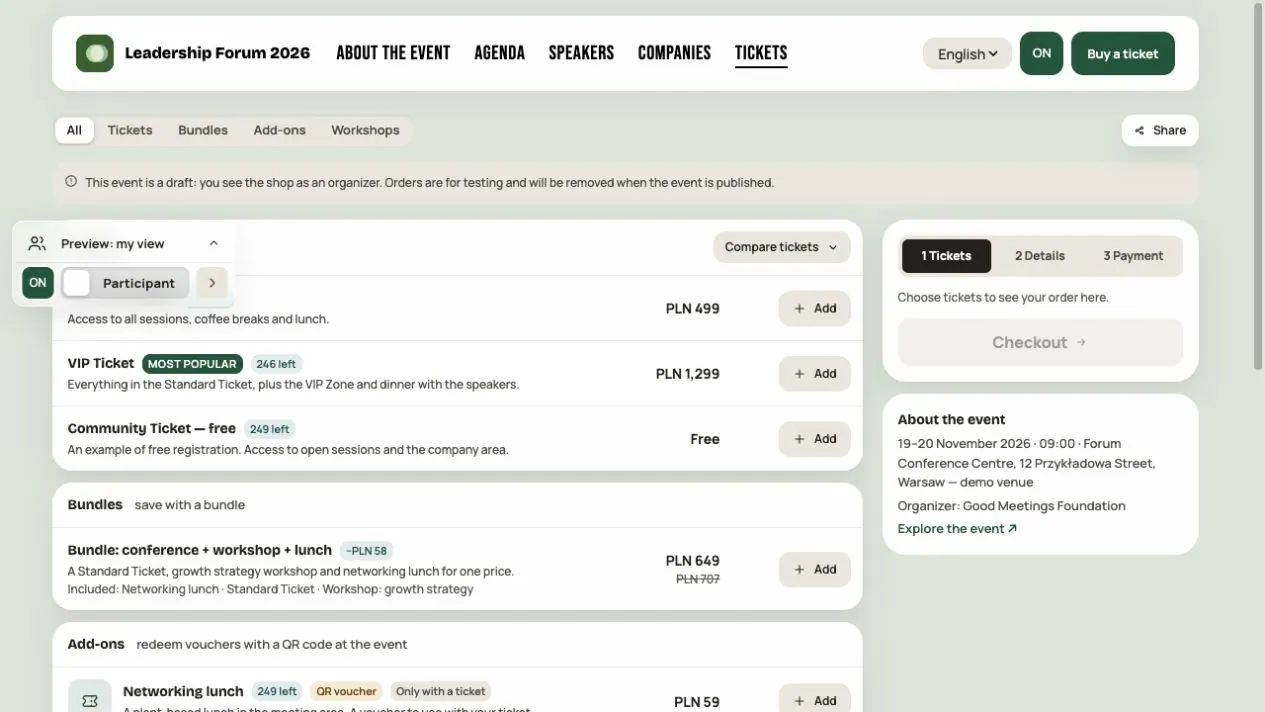
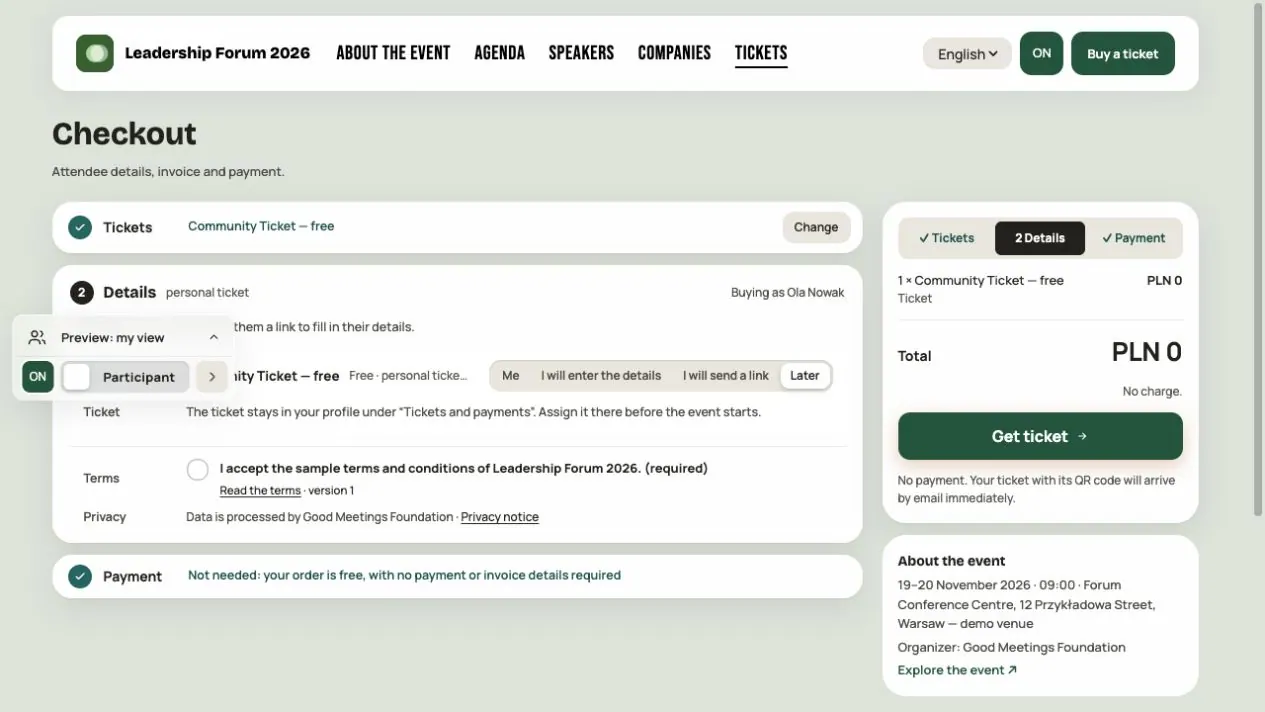
Click View shop. Add a ticket and click Next: details. The buyer chooses who the ticket is for: Me, I will enter the details, I will send a link or Later.
For a 0 order there's no payment, and the last button is Get ticket. For a paid order, check the amount and invoice details. The payment is simulated.
Finally, check the order in the Orders tab.
Step 8. Handle orders
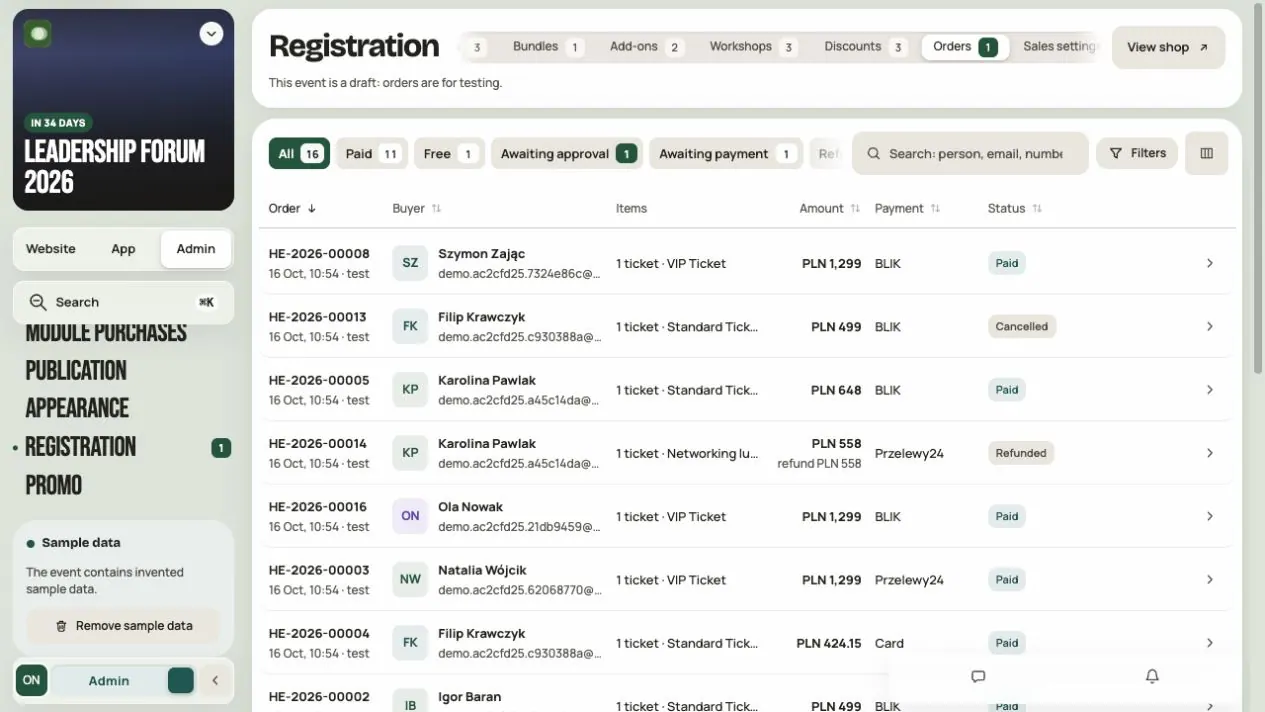
In Orders you filter by state: Paid, Free, Awaiting approval, Awaiting payment, Refunds, Cancelled. Click the buyer to open the order: items, people, payment and history.
Refund: in the order, select what you're refunding and click the Refund button with the amount. The buyer gets a refund email and the refunded tickets stop working. A refund can't be undone. Remember that today a refund is simulated. No money reaches a bank.
A participant can't return a paid ticket on their own. If they want a refund, they write to you.
Find an order and check its documents
In Search orders, enter a person, email or order number. Use Filters to select payment methods. Combine these with the order status and table sorting. More results load as you scroll; the first rows are not the entire list. The sales summary in the footer covers the event, while the match count follows your filters.
The order card shows the buyer, holders, add-on variants, commission, documents and history. Resend ticket sends the message for the selected ticket again. The order confirmation PDF is not a VAT invoice. QR tickets have separate files. Having a QR code does not mean a reception scanner is available.
Archiving an offer stops further sales but existing tickets remain valid. This is separate from refunding an order.
Step 9. Applications and the waiting list
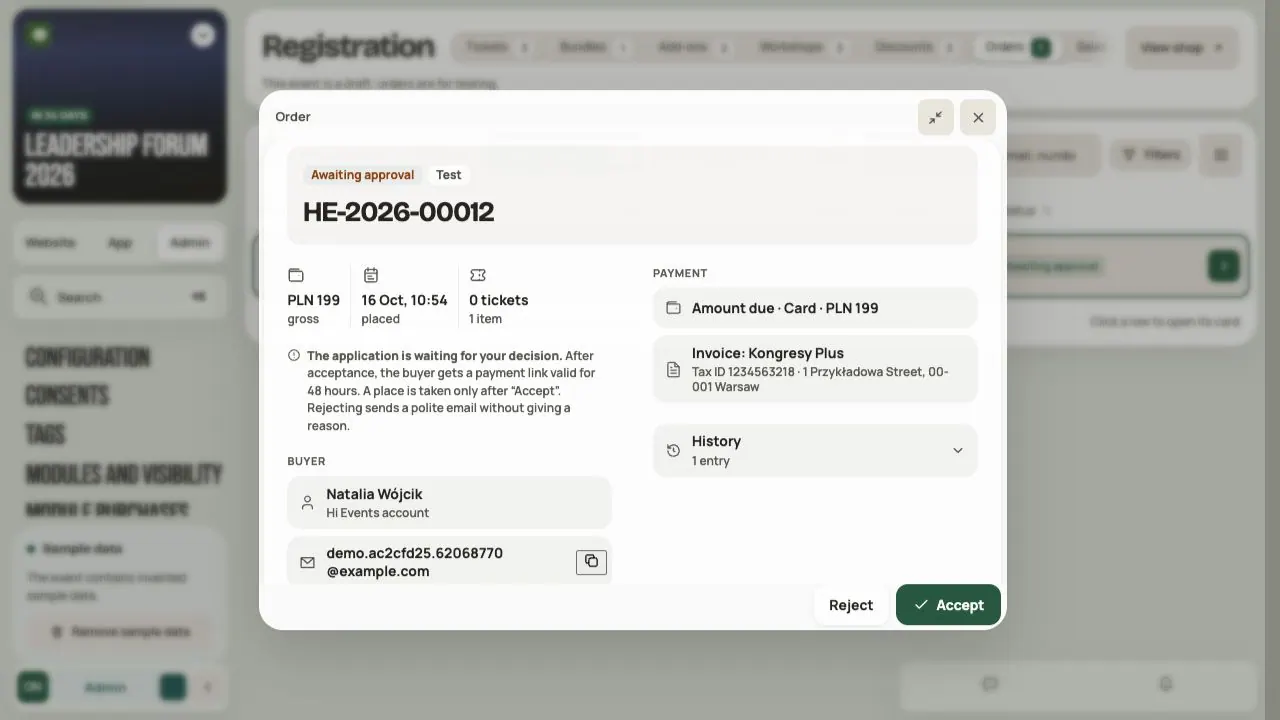
Applications. If a ticket or workshop needs approval, open the Awaiting approval filter. Click Accept or Reject. For a paid item, the buyer gets a payment link valid for 48 hours. They get the ticket only after paying.
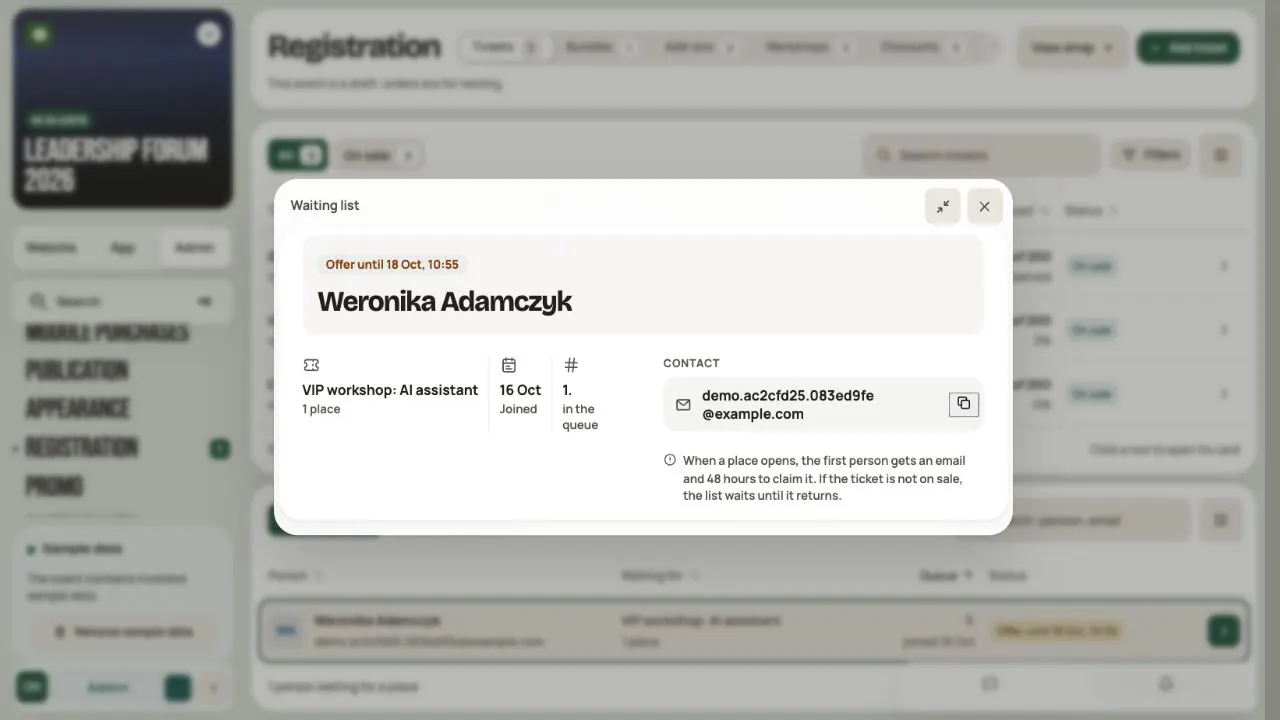
Waiting list. When places run out, people can join the list. When a place frees up, the first person gets an email and 48 hours to buy. The email alone isn't a ticket yet.
Before you start selling
- Every ticket has a clear description, price and number of places.
- Workshop times match the Agenda.
- Groups after purchase give only the planned access.
- Discounts and bundles give the right total in the cart.
- Documents are published in Consents.
- Buying is tested in the shop.
Frequently asked questions
Are payments real?
No, they're simulated for now. Nobody is charged and refunds don't reach a bank.
Does a free event need tickets?
Not necessarily, but a 0 ticket helps you collect named sign-ups and keep track of places.
Does an application take a place right away?
No. A place is taken only when you click Accept. For a paid item, the person still has to pay within 48 hours.
Does a VIP ticket give access to the organizer panel?
No. It can grant the VIP group, which opens selected content. Managing the event is a separate role.
Why are there fewer free places than I expect?
Places can be held for a while by orders in payment or by offers to the waiting list. A shared pool may also apply.
Can a participant give their ticket to someone else?
Only if you turn on Can be transferred for that ticket. Transfers work until the event starts.
Read on
All articles →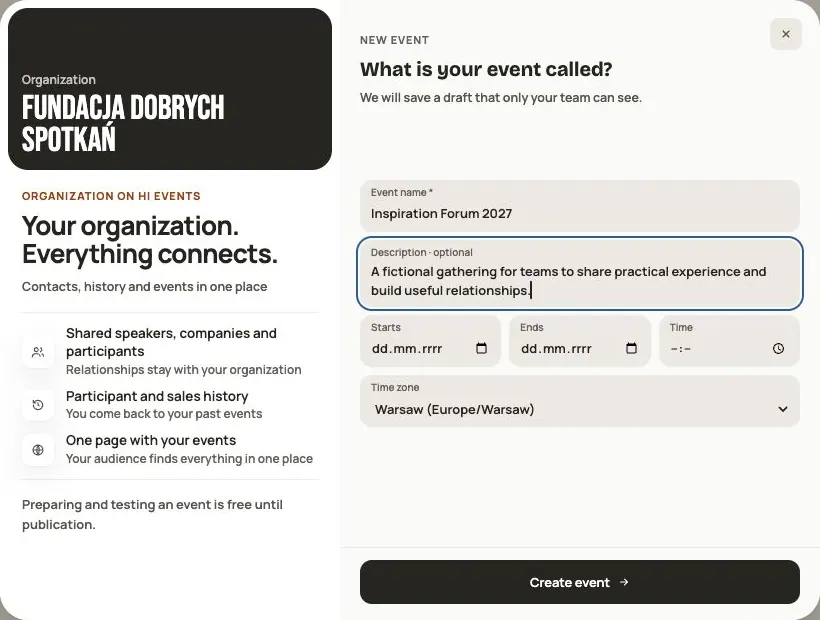 Help
Your first event, step by step
From draft to publication: name and dates, consents, tickets, content, modules, credits and the „Publish event” button.
 Help
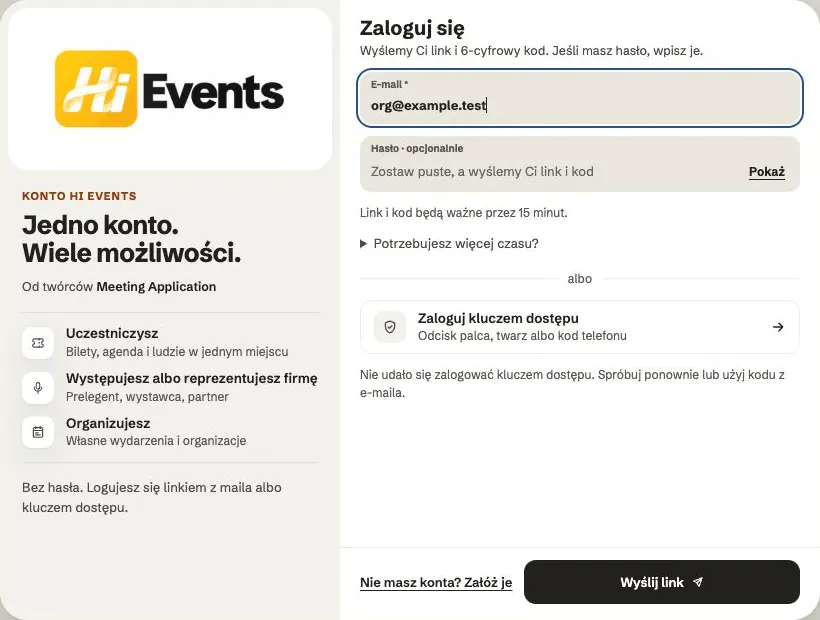
Signing in: link, code, password and passkey
Four ways to sign in to Hi Events, how to set or change your password, and how to sign in with your fingerprint.
 Help
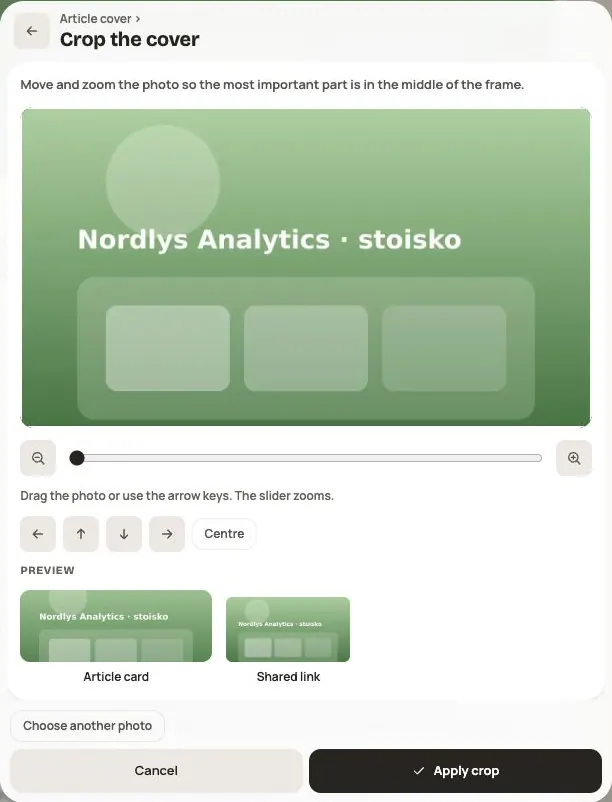
Photos and files: formats and limits
Which photos you can add, how big they can be, and what to do when a file won't upload.